LLMs as Classifiers - Guide
1. Objective
This guide provides step-by-step instructions on finetuning a model for Text Classification tasks on Emissary using our novel classification approach. In this approach, we add a classification head on top of the base LLMs that returns probabilities for a given set of labels. We recommend using Qwen3-4B-Base for this task.
2. Dataset Preparation
Prepare your dataset in the appropriate format for the classification task.
Classification Data Format
Each entry should contain:
- Prompt: The input text for classification.
- Completion: A dictionary with a single label with value 0 or 1 (0: negative / 1: positive)
For Binary Classification Data (Single Label)
{
  "prompt": "This is a sample text for binary classification",
  "completion": {"is_cat": 1} // {"is_cat": 0}
}
For Multi-Class / Multi-Label Binary Classification
In cases where multiple labels are evaluated independently, the completion should be a dictionary where each label is mapped to a binary value (0 or 1) to indicate its relevance.
Multiclass
{
  "prompt": "This is a sample text for multiclass classification",
  "completion": {
    "Label_1": 1,
    "Label_2": 0,
    "Label_3": 0,
    "Label_N": 0
  }
}
Multilabel
{
  "prompt": "This is a sample text for multilabel classification",
  "completion": {
    "Label_1": 1,
    "Label_2": 0,
    "Label_3": 1,
    "Label_N": 0
  }
}
3. Finetuning Preparation
Please refer to the in-depth guide on Finetuning on Emissary here - Quickstart Guide.
Create Training Project
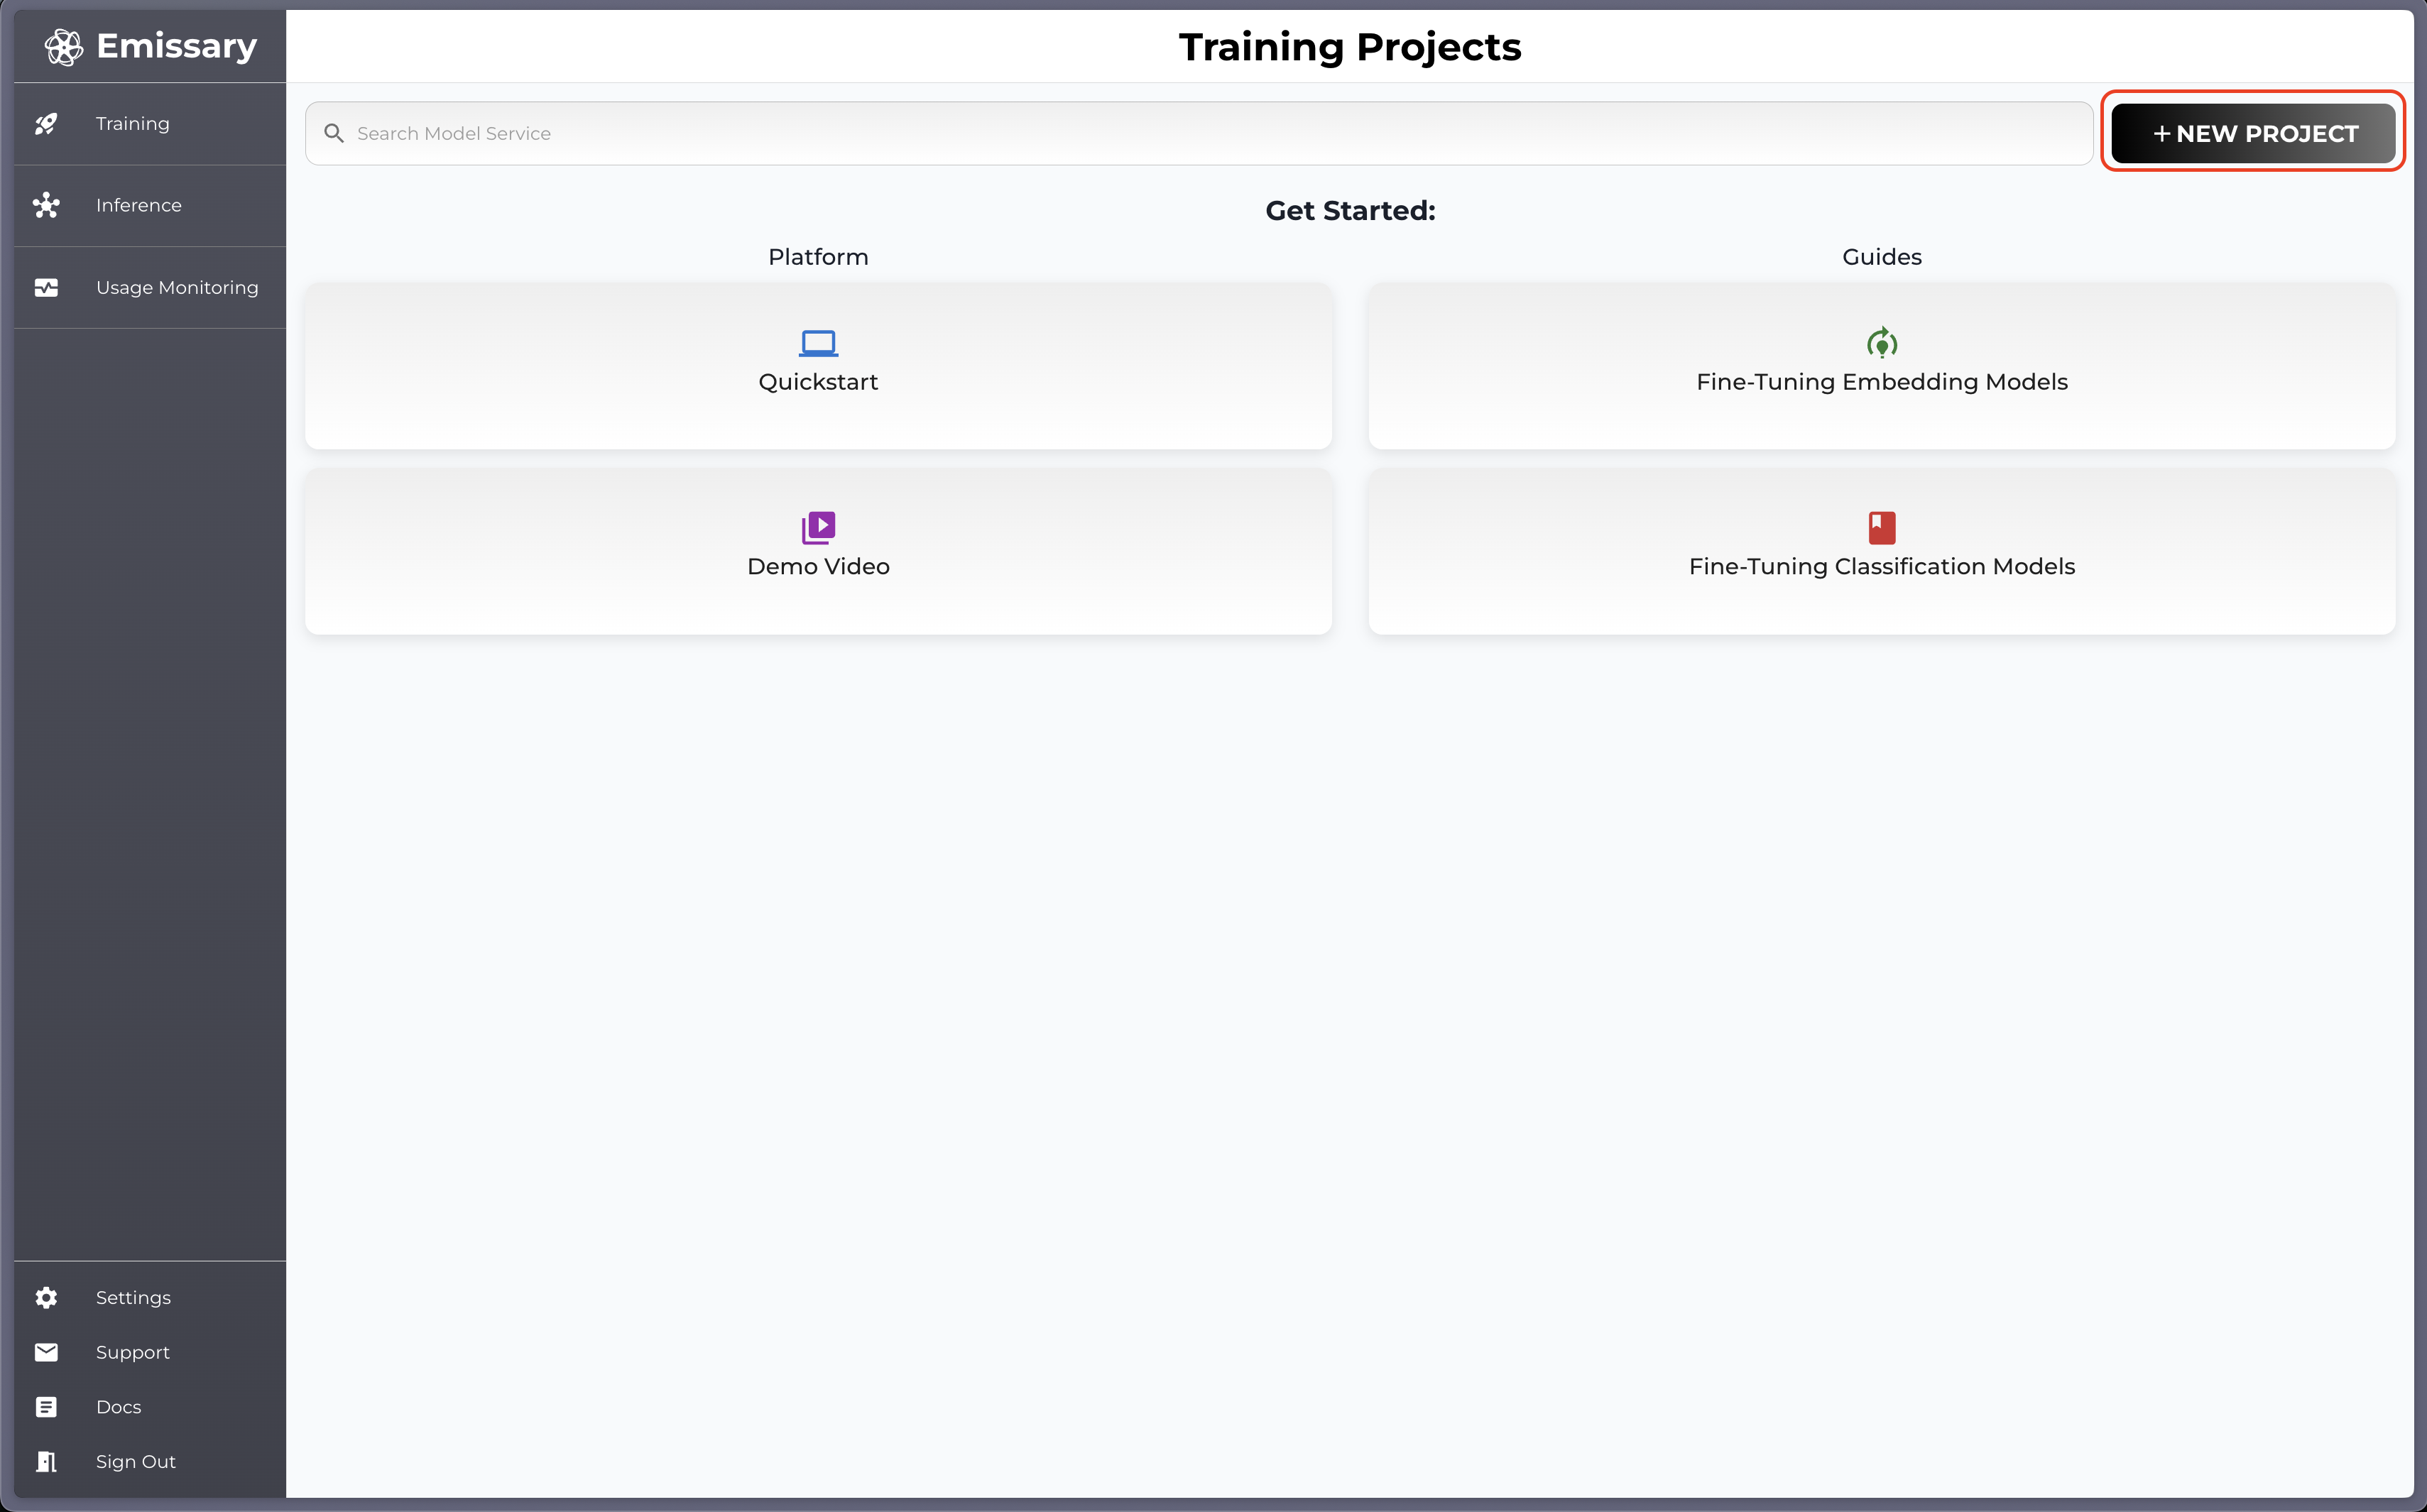
Navigate to Dashboard arriving at Training, the default page on the Emissary platform.
-
Click + NEW PROJECT in the dashboard.
-
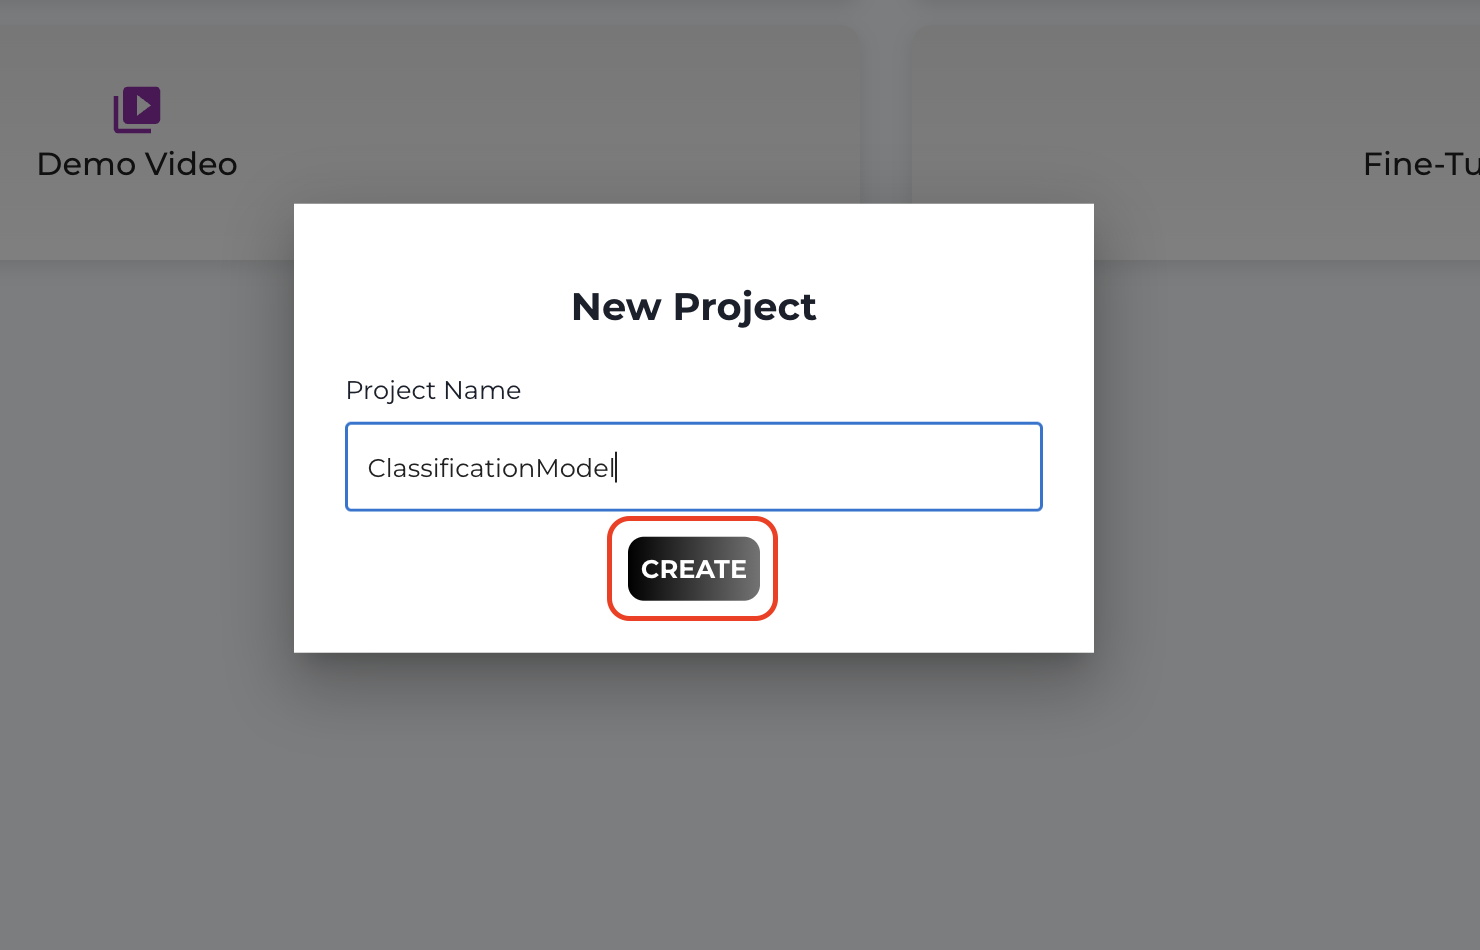
In the pop-up, enter a new training project name, and click CREATE.
Uploading Datasets
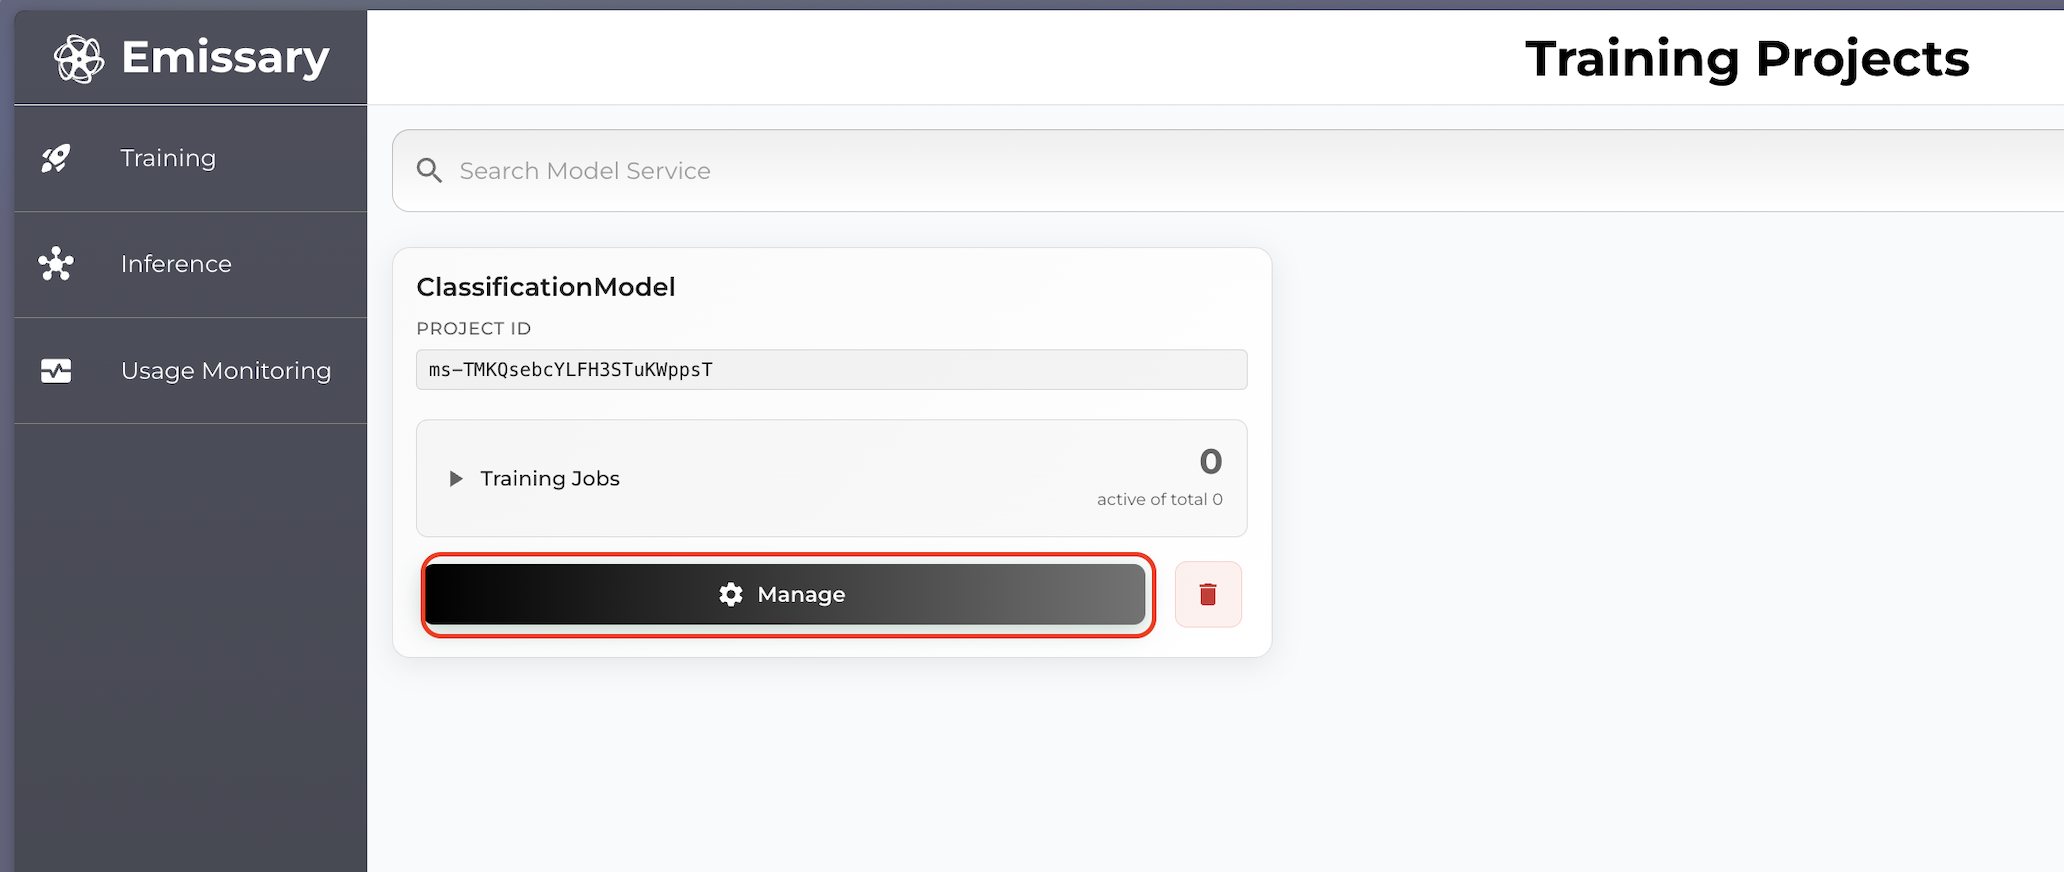
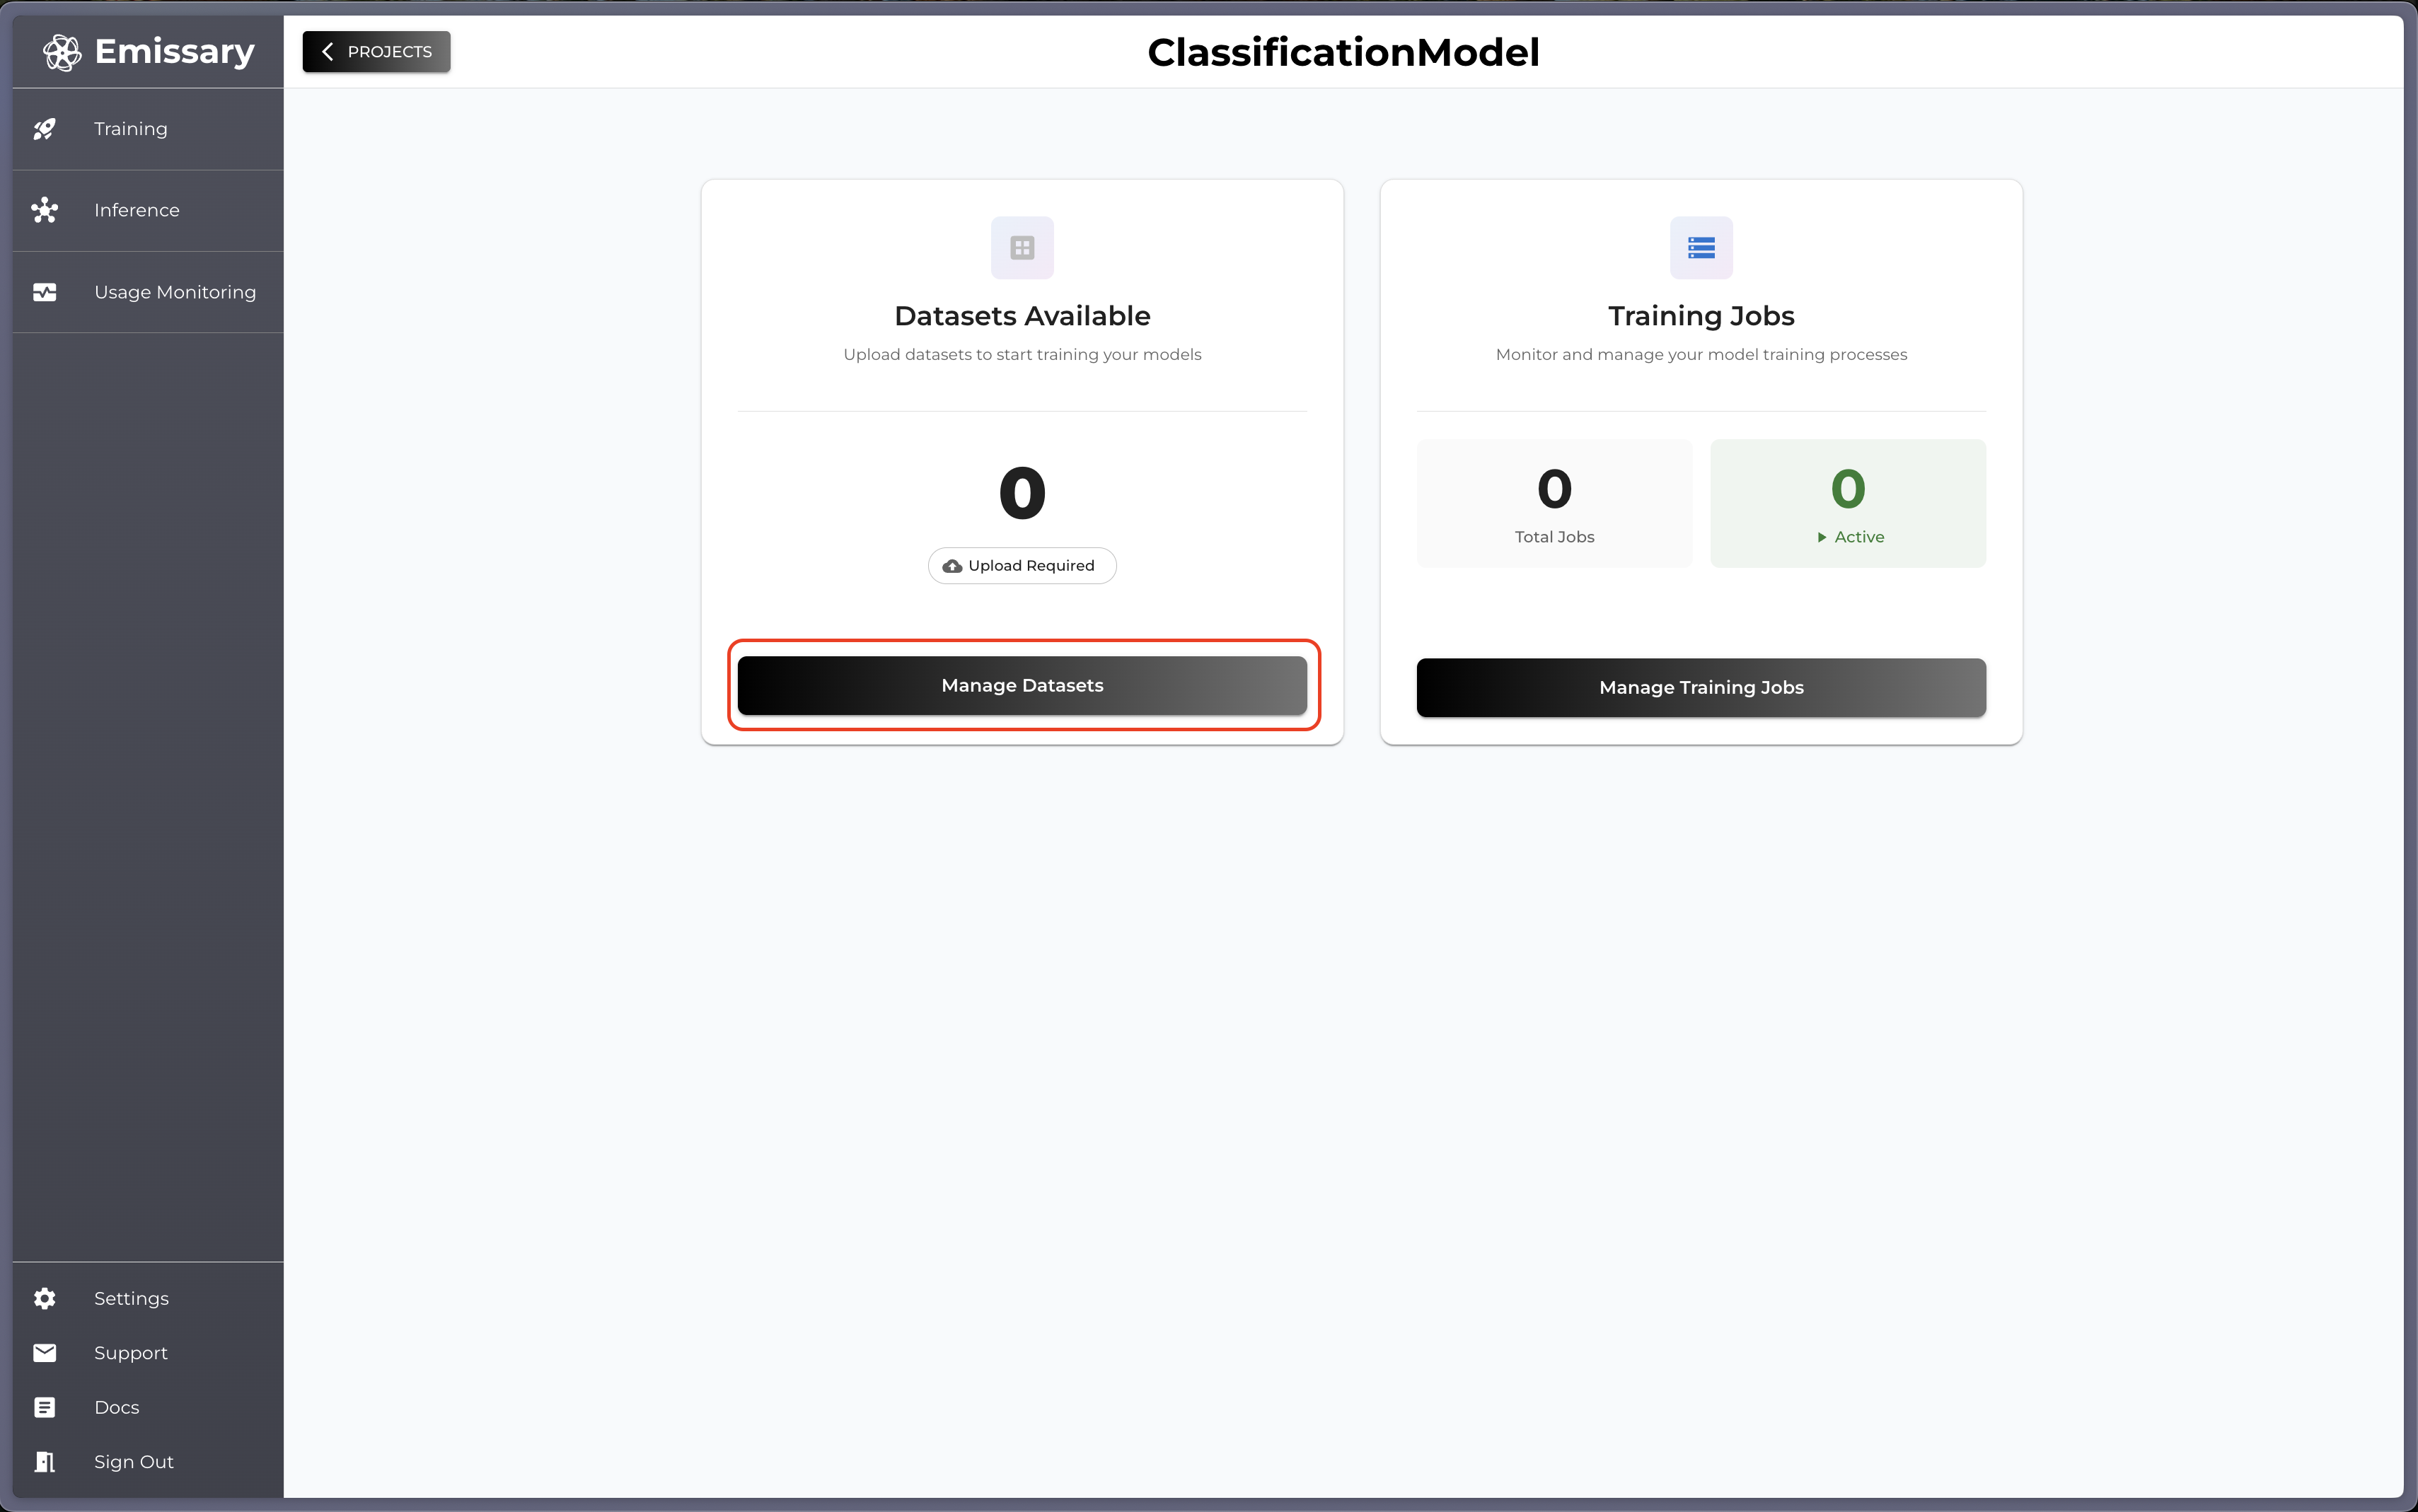
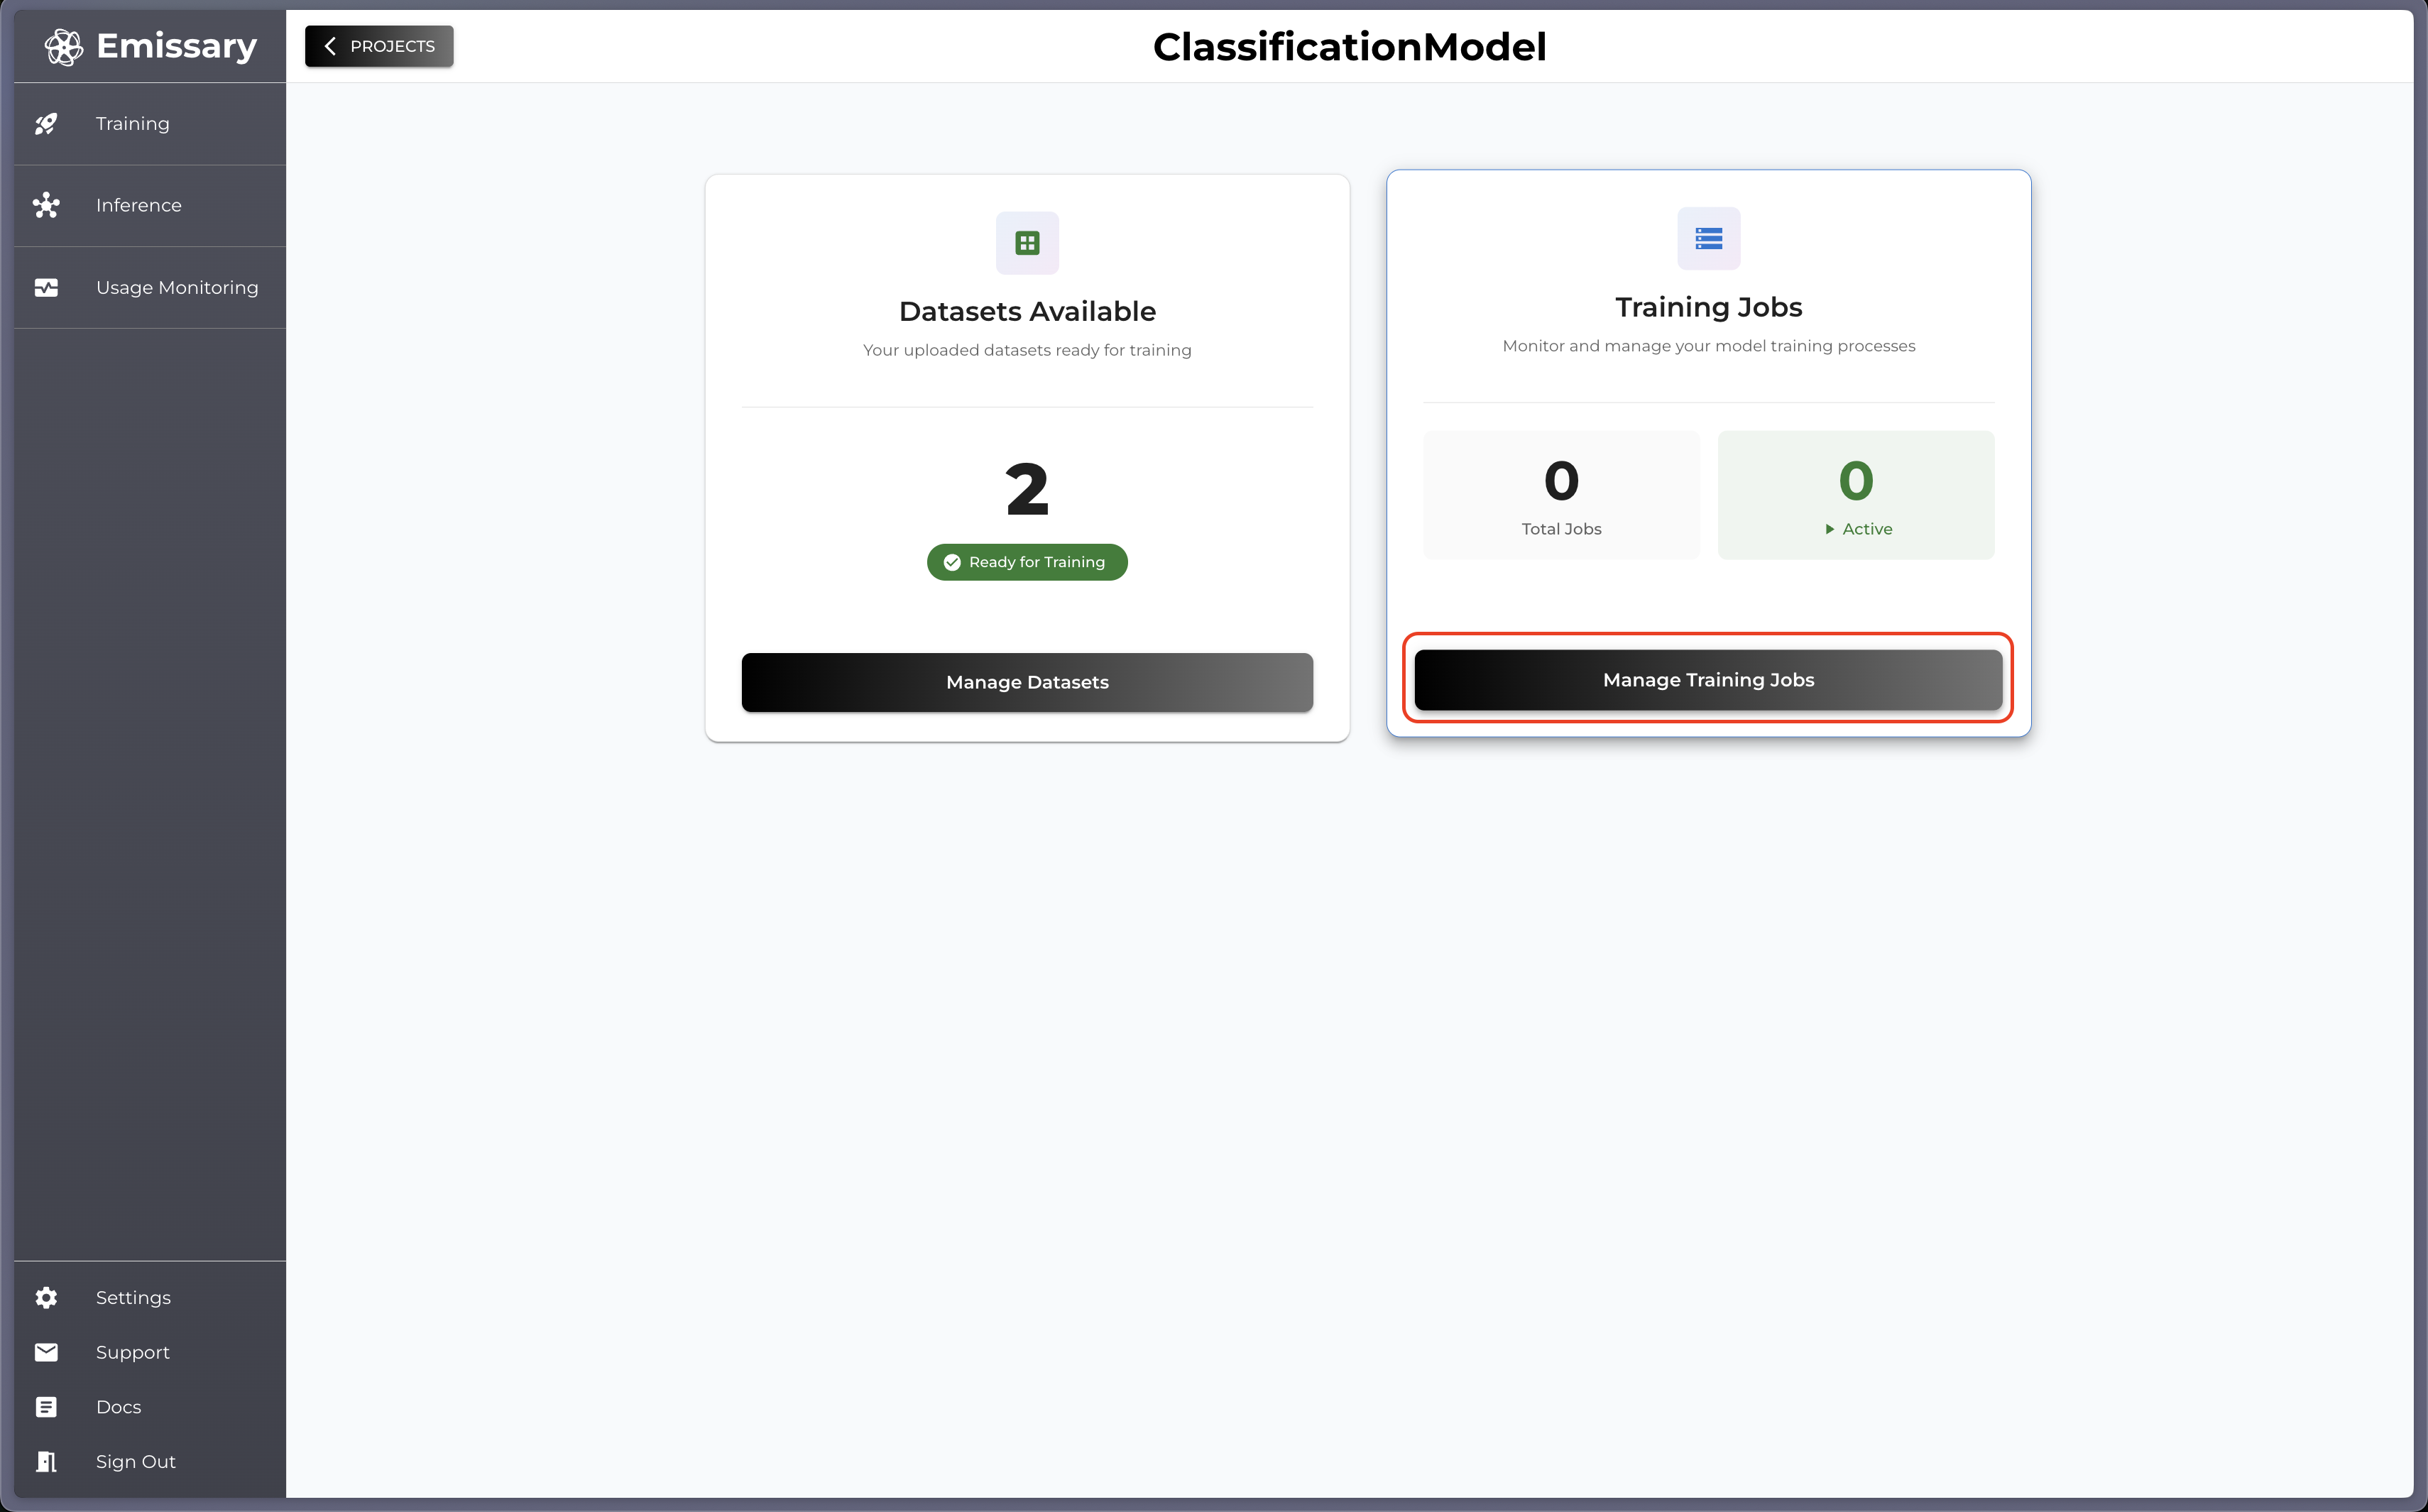
A tile is created for your task. Click Manage to enter the task workspace.
-
Click Manage Datasets in the Datasets Available tile.
-
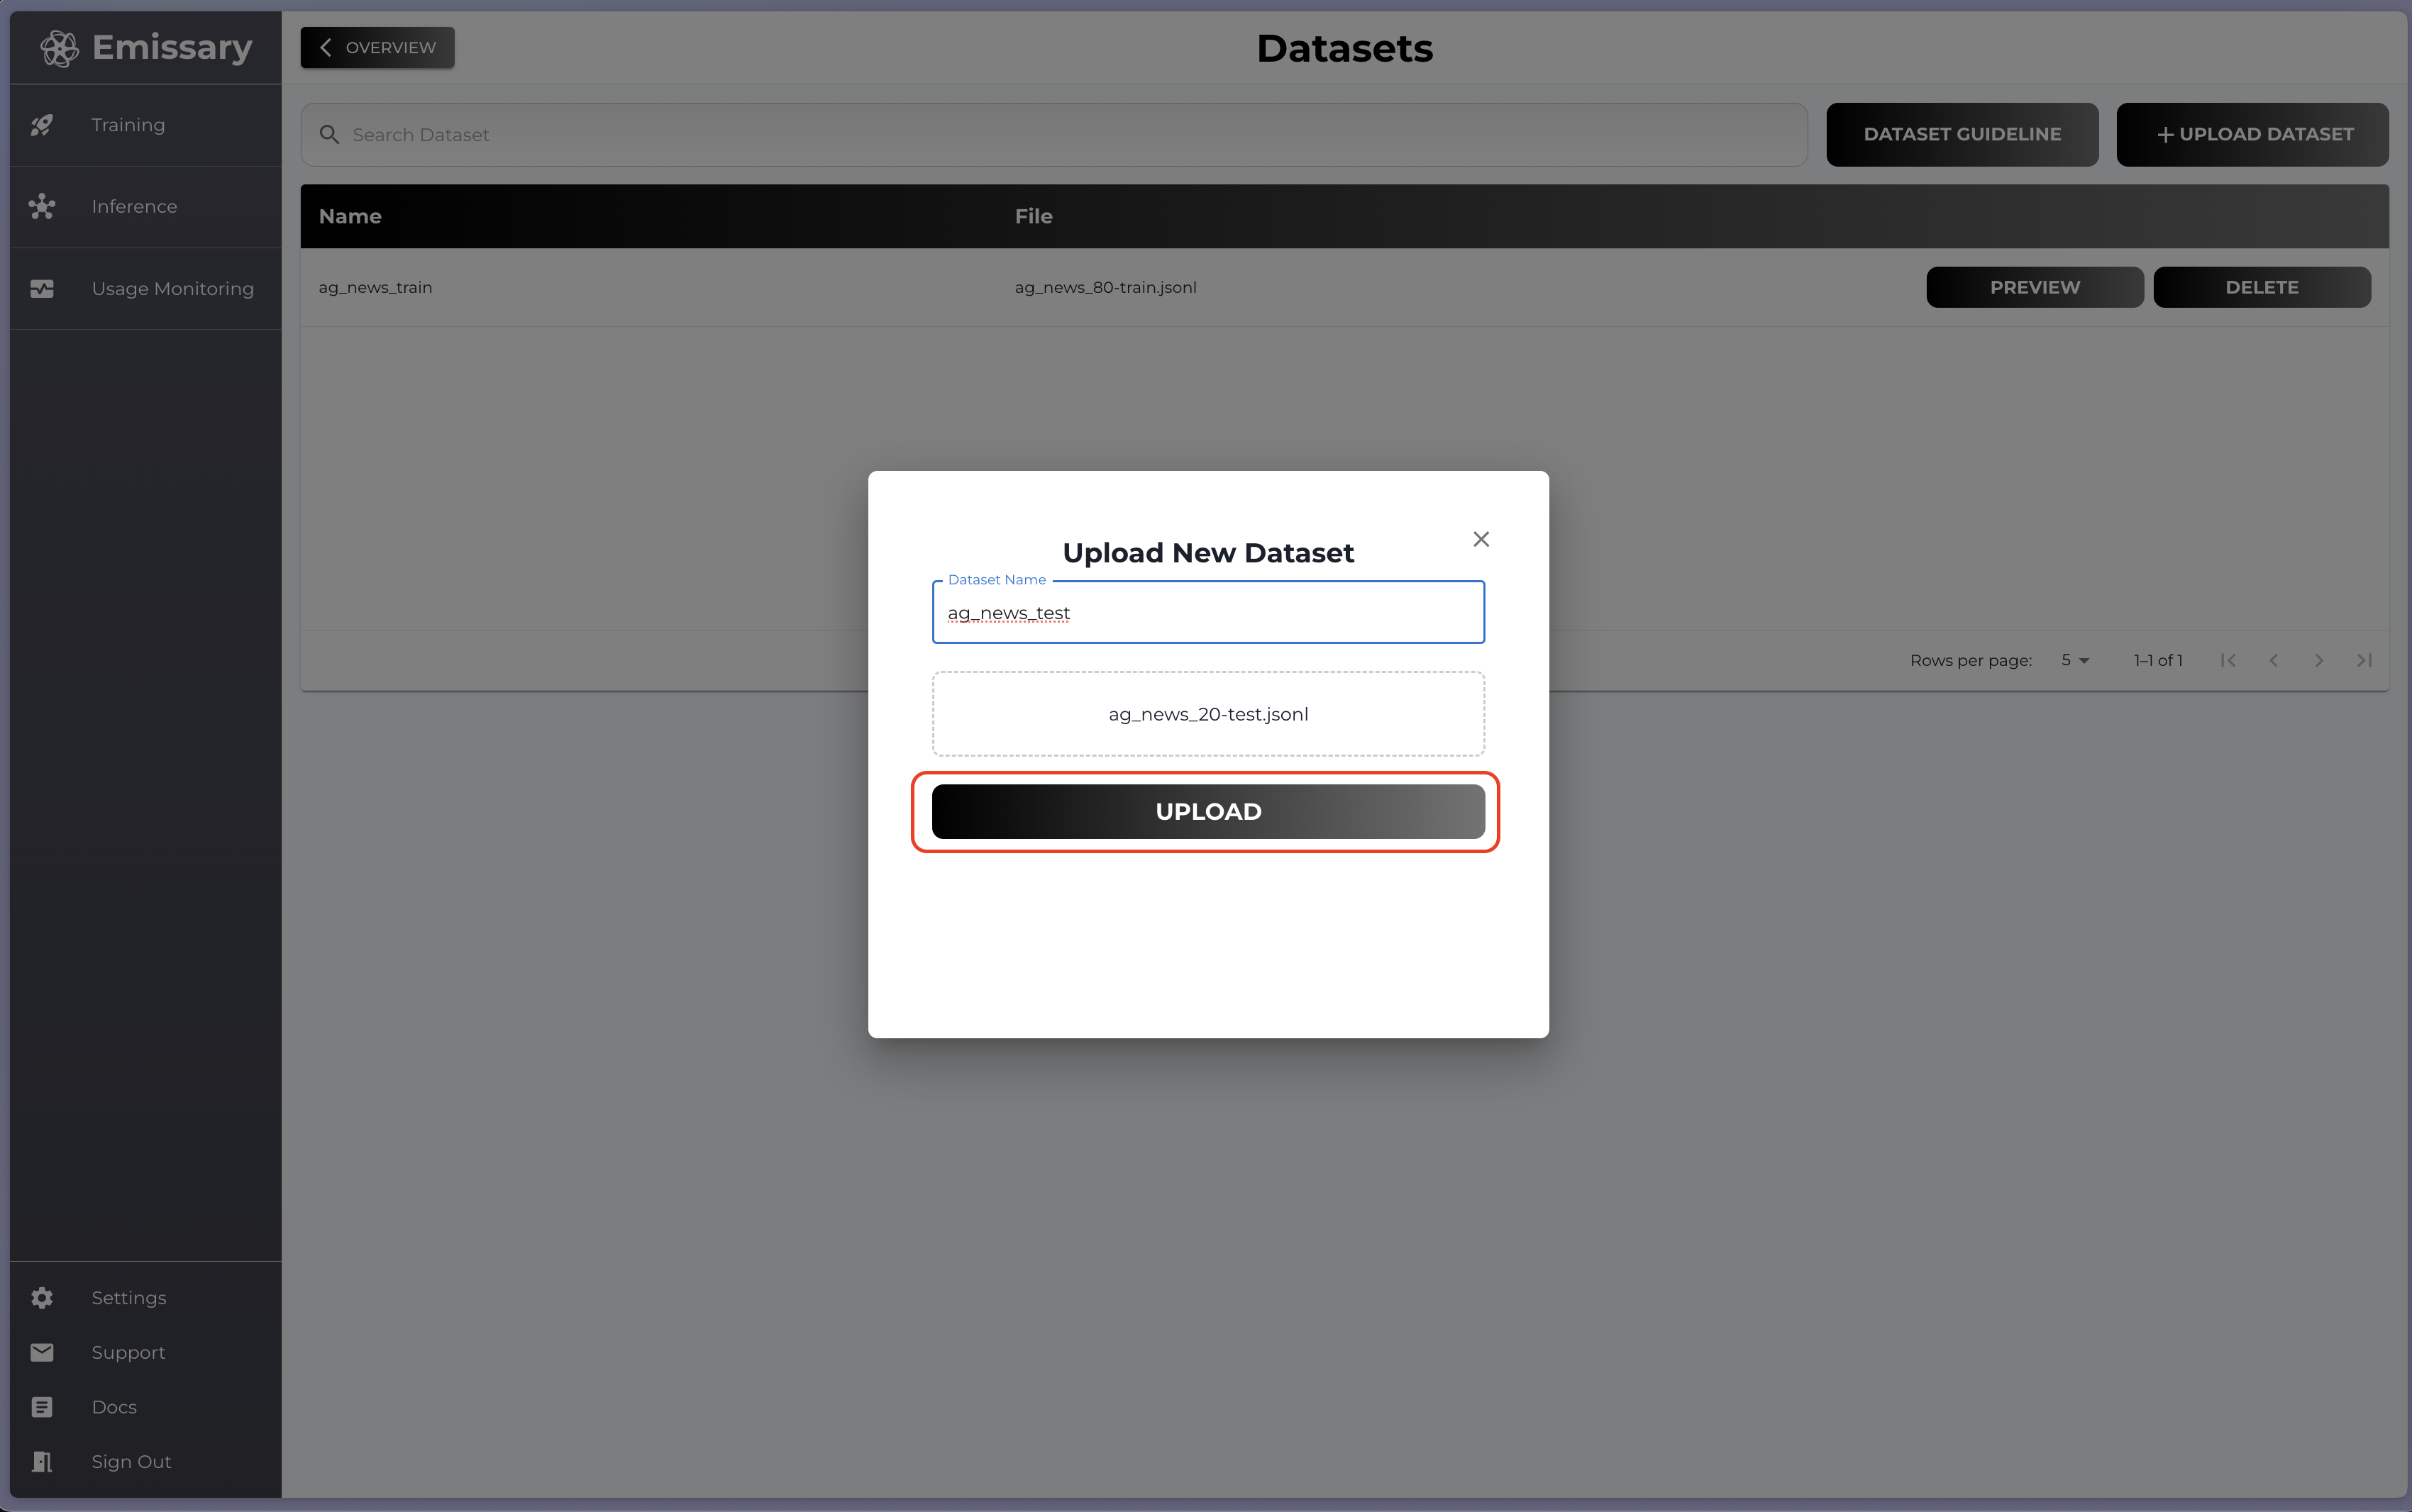
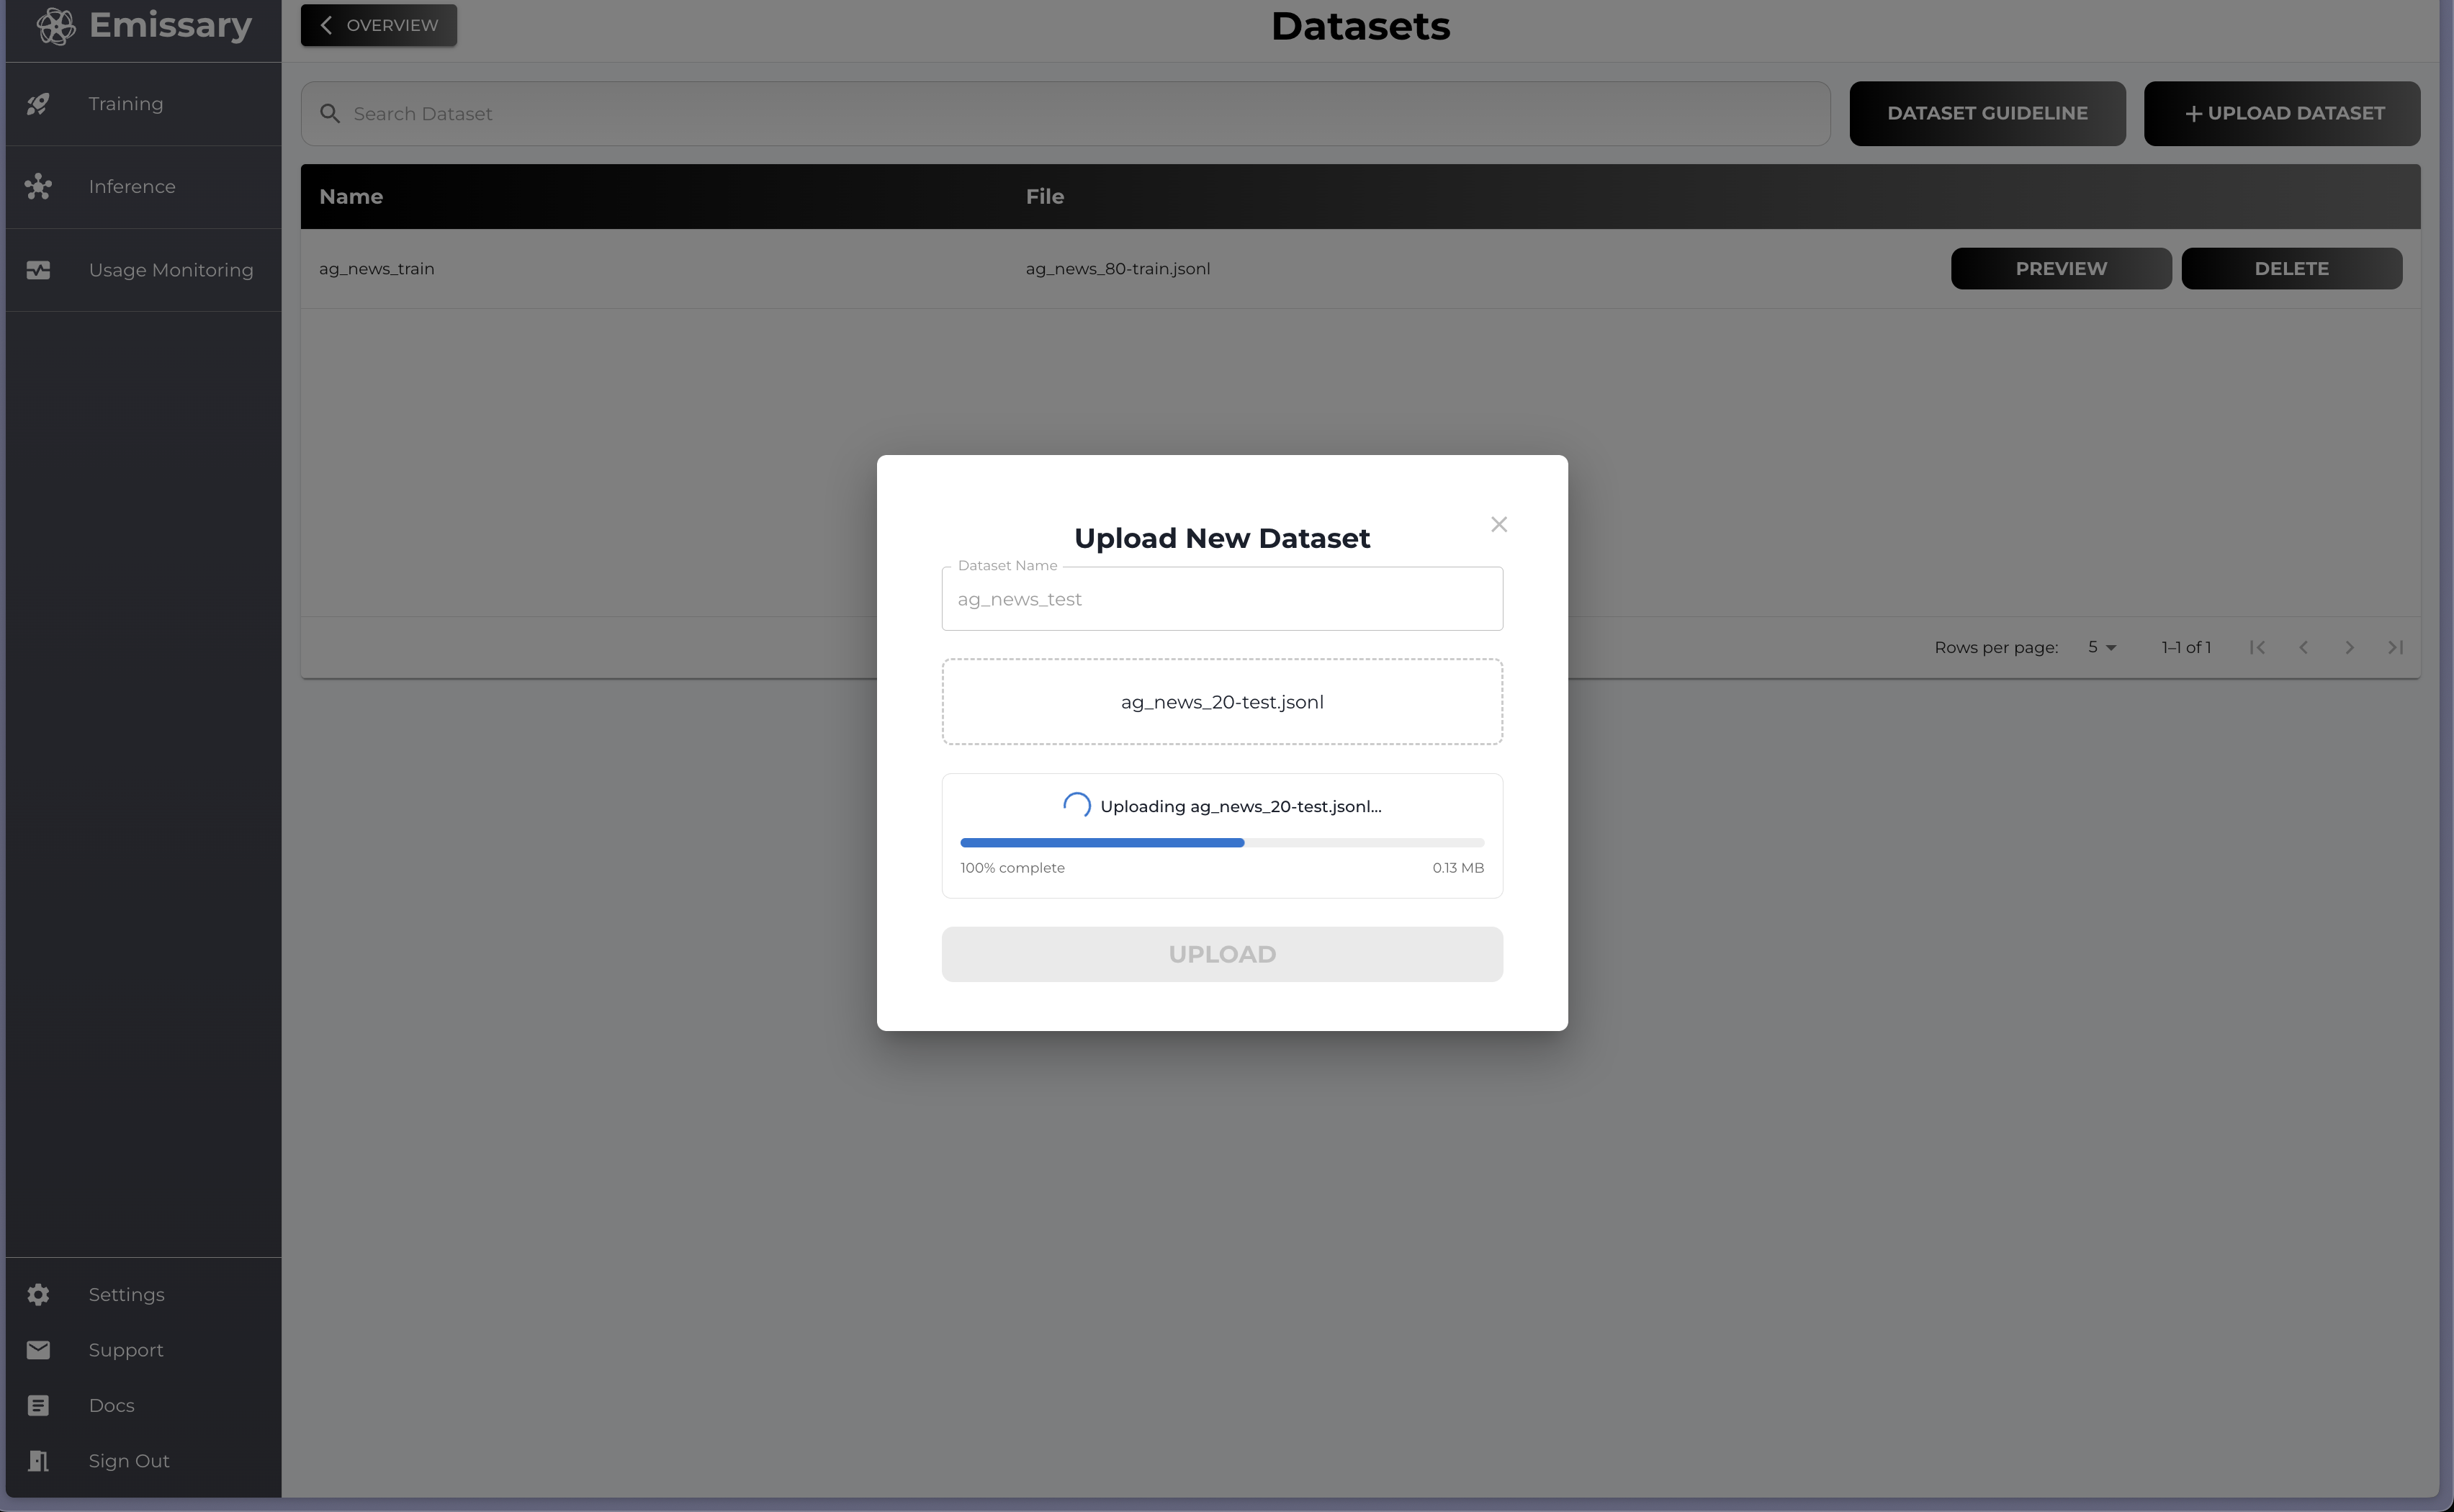
Click on + UPLOAD DATASET and select training and test datasets.
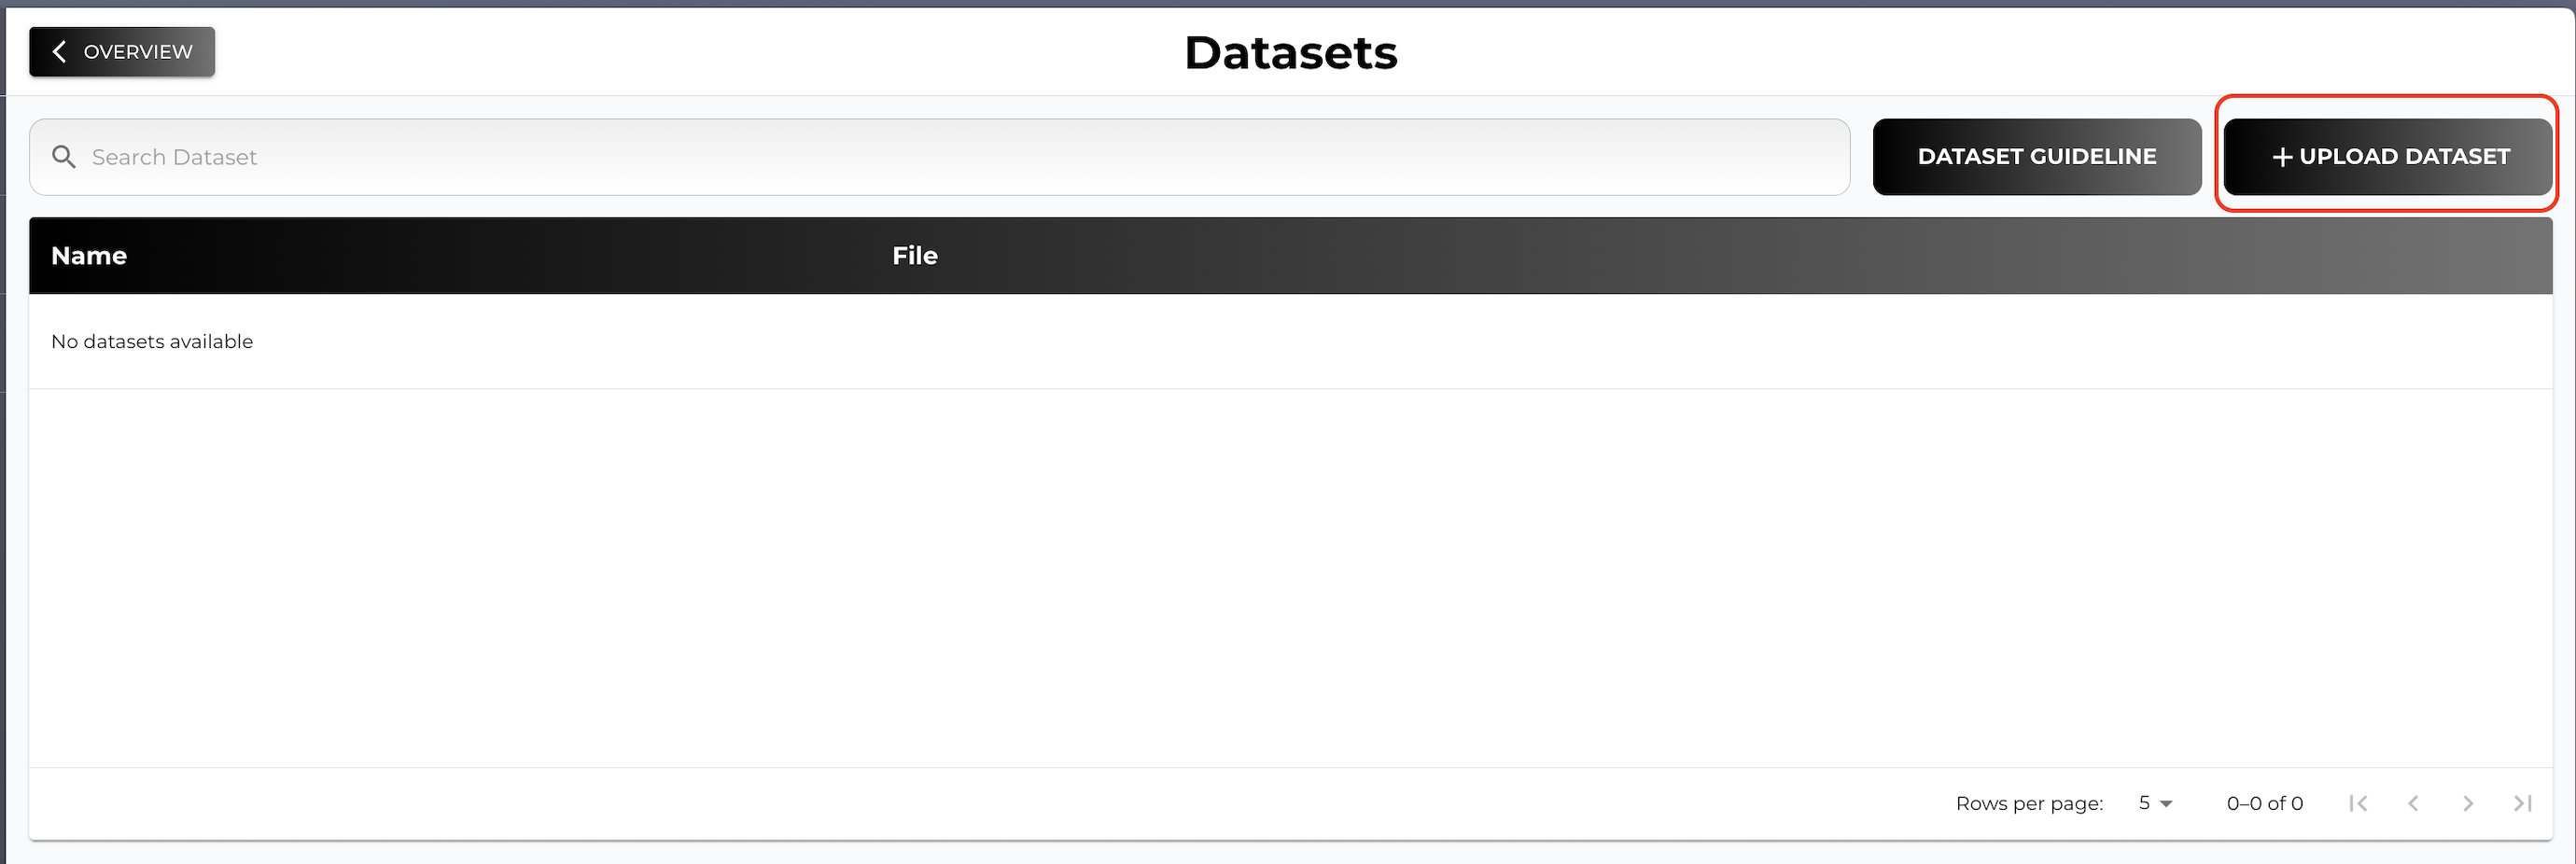
-
Name dataset and upload the file
4. Model Finetuning
Now, go back one panel by clicking OVERVIEW and then click Manage Training Jobs in the Training Jobs tile.
Click + NEW TRAINING JOB button and fill in the configuration
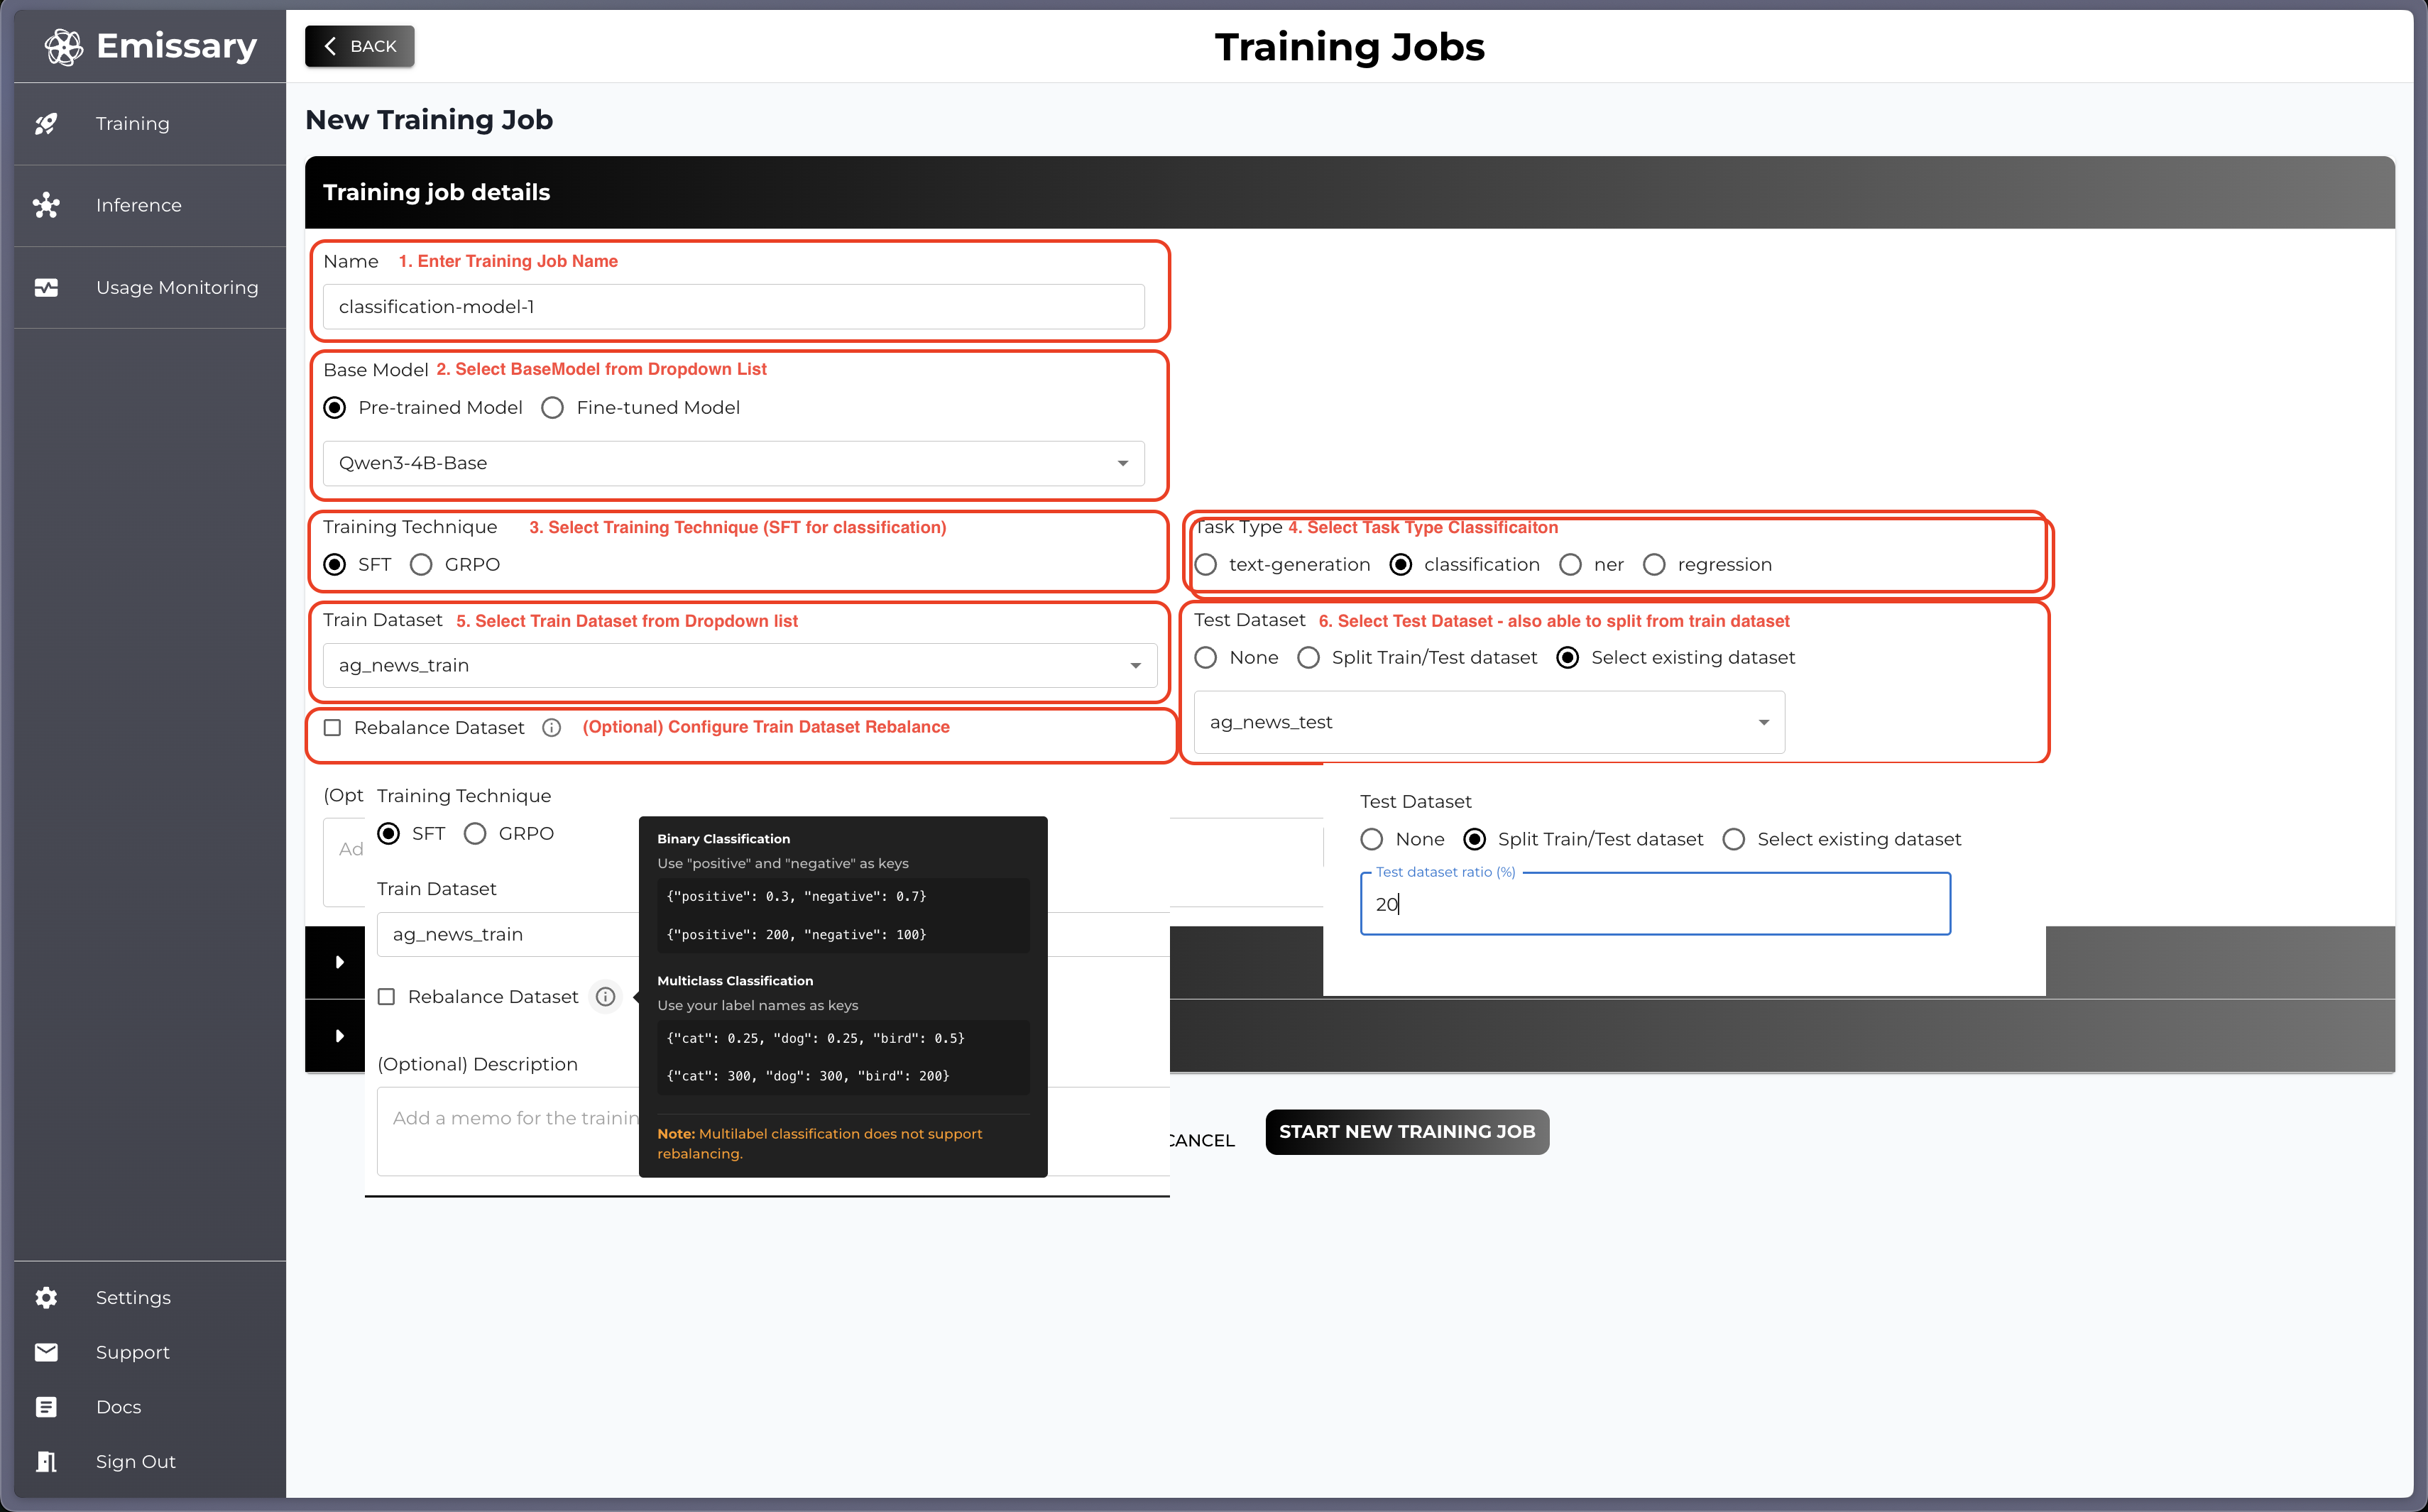
Required Fields
- Name: Name of your training job (fine-tuned model)
- Base Model: Chose the backbone pre-trained / fine-tuned model from the drop down list
- Training Technique: Chose training technique to use, classification only supported in SFT
- Task Type: Select task type Classification
- Train Dataset: Select dataset you would like to train on the backbone model
(Optional)
-
Test Dataset: You can provide a test dataset which then will be used in testing (evaluation phase). If None selected, the testing phase will be skipped.
- Split Train/Test Dataset: Use ratio of train dataset as a test set
- Select existing dataset: Upload separate dataset for test
-
Rebalance Dataset: You can also rebalance your train dataset referring following format.
- Binary Classification: Use "positive" and "negative" as keys. Values can be proportions (0.0-1.0) or counts.
e.g){"positive": 0.3, "negative": 0.7}or{"positive":200", "negative": 100} - Multiclass Classification: Use your label names as keys. Values can be proportions (0.0-1.0) or counts.
e.g){"cat": 0.25, "dog": 0.25, "bird": 0.5}or{"cat": 300, "dog": 300, "bird": 200} - Multilabel Classification: Does not support rebalancing.
- Binary Classification: Use "positive" and "negative" as keys. Values can be proportions (0.0-1.0) or counts.
-
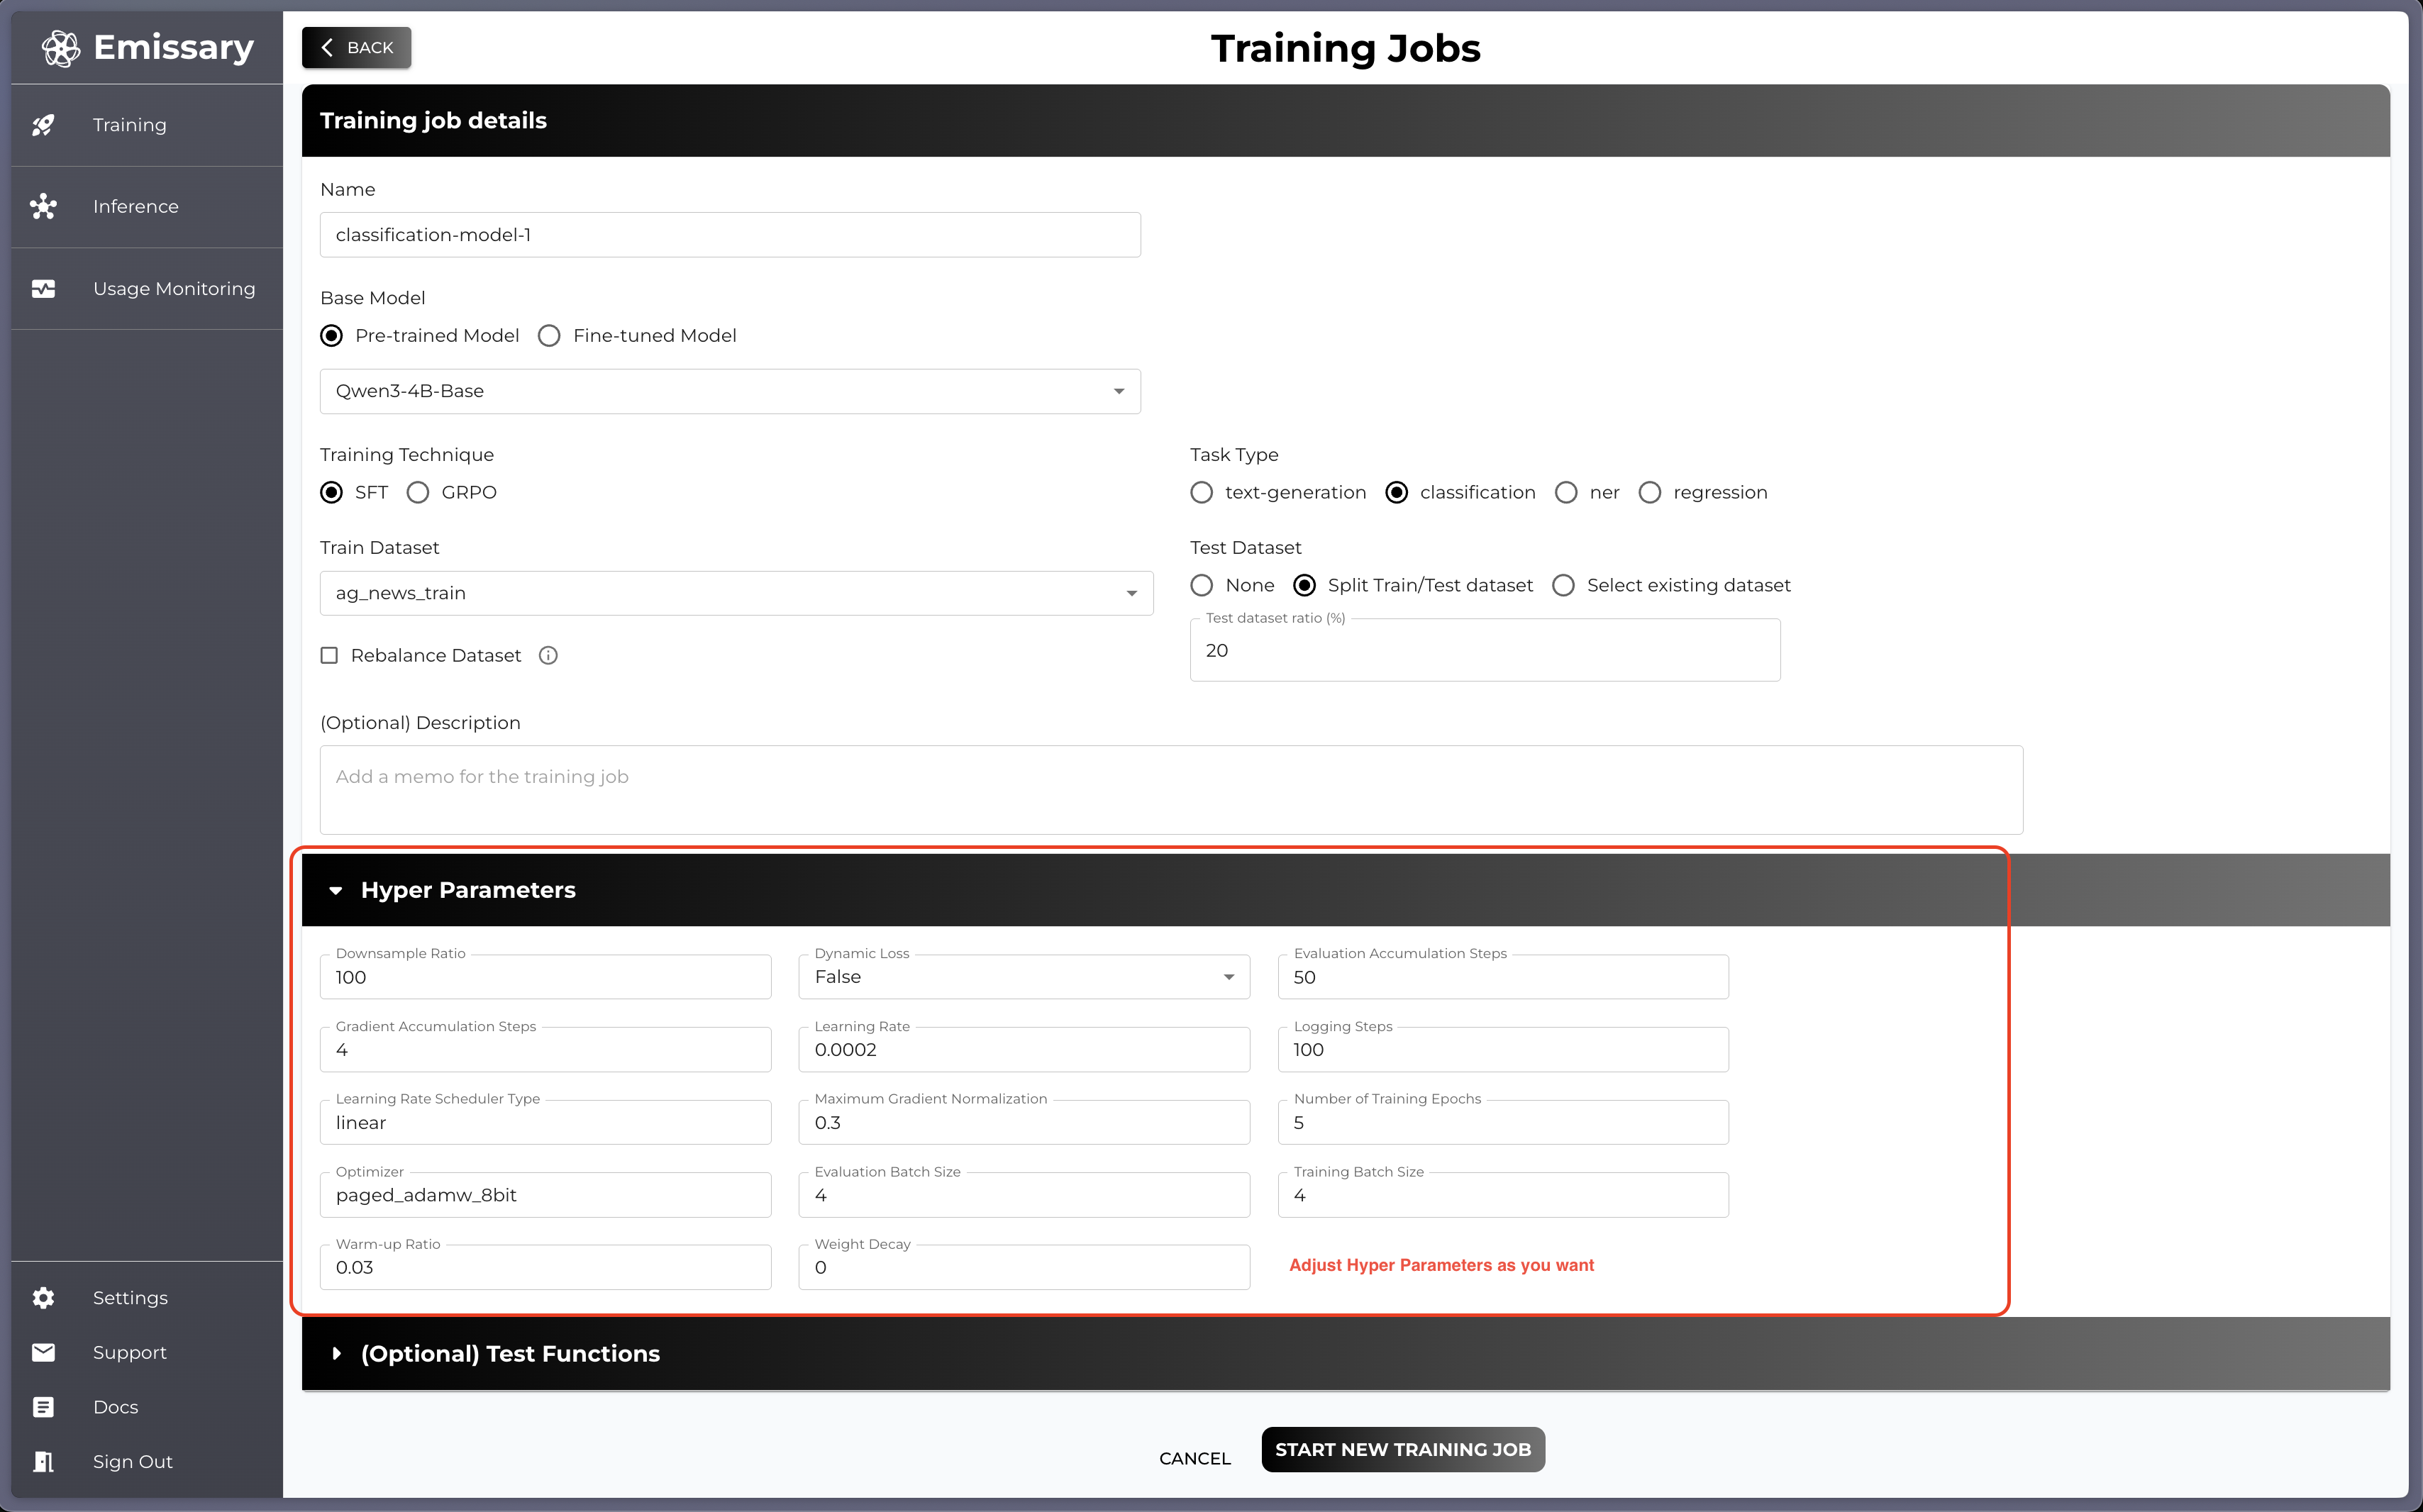
Hyper Parameters: Hyper parameters’ value is all set with GOOD default values but you can adjust the value if you want
-
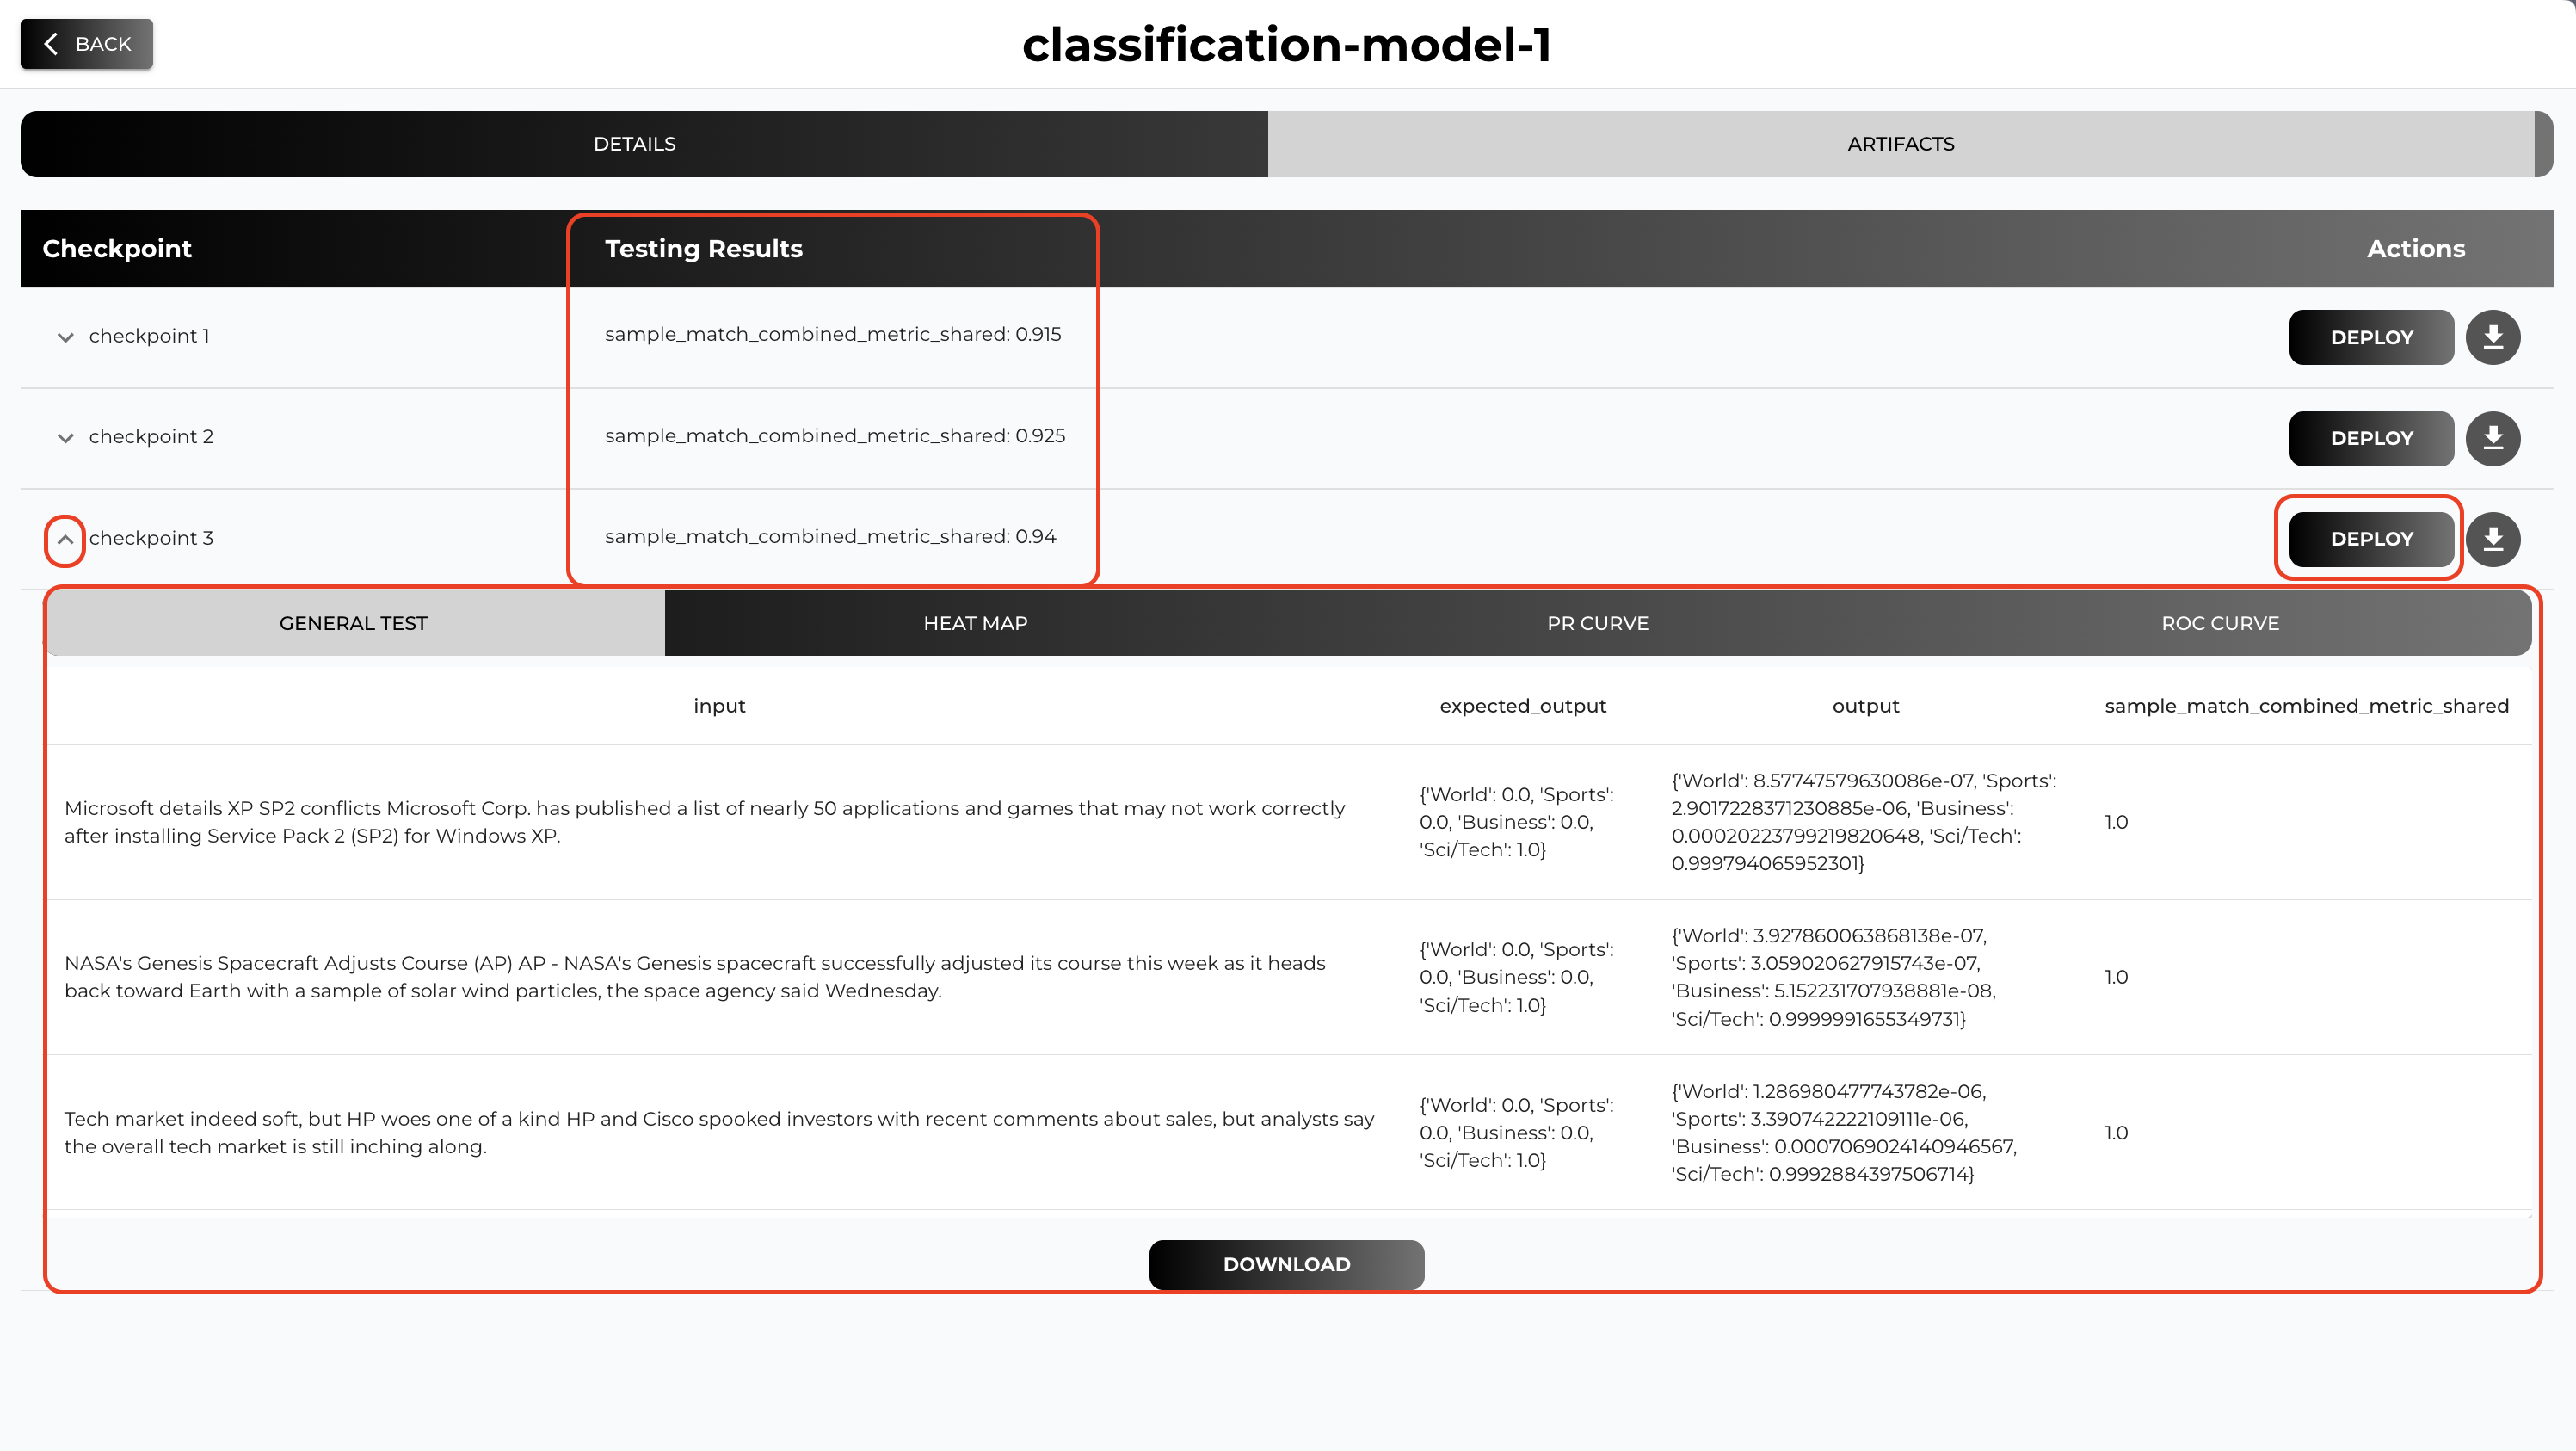
Test Functions: When you select any Test Dataset option, you can also provide your own test functions which provides you an aggregate results. We recommend to try our
sample match combined metric shared
After initiating the training job you will see your training job on the list
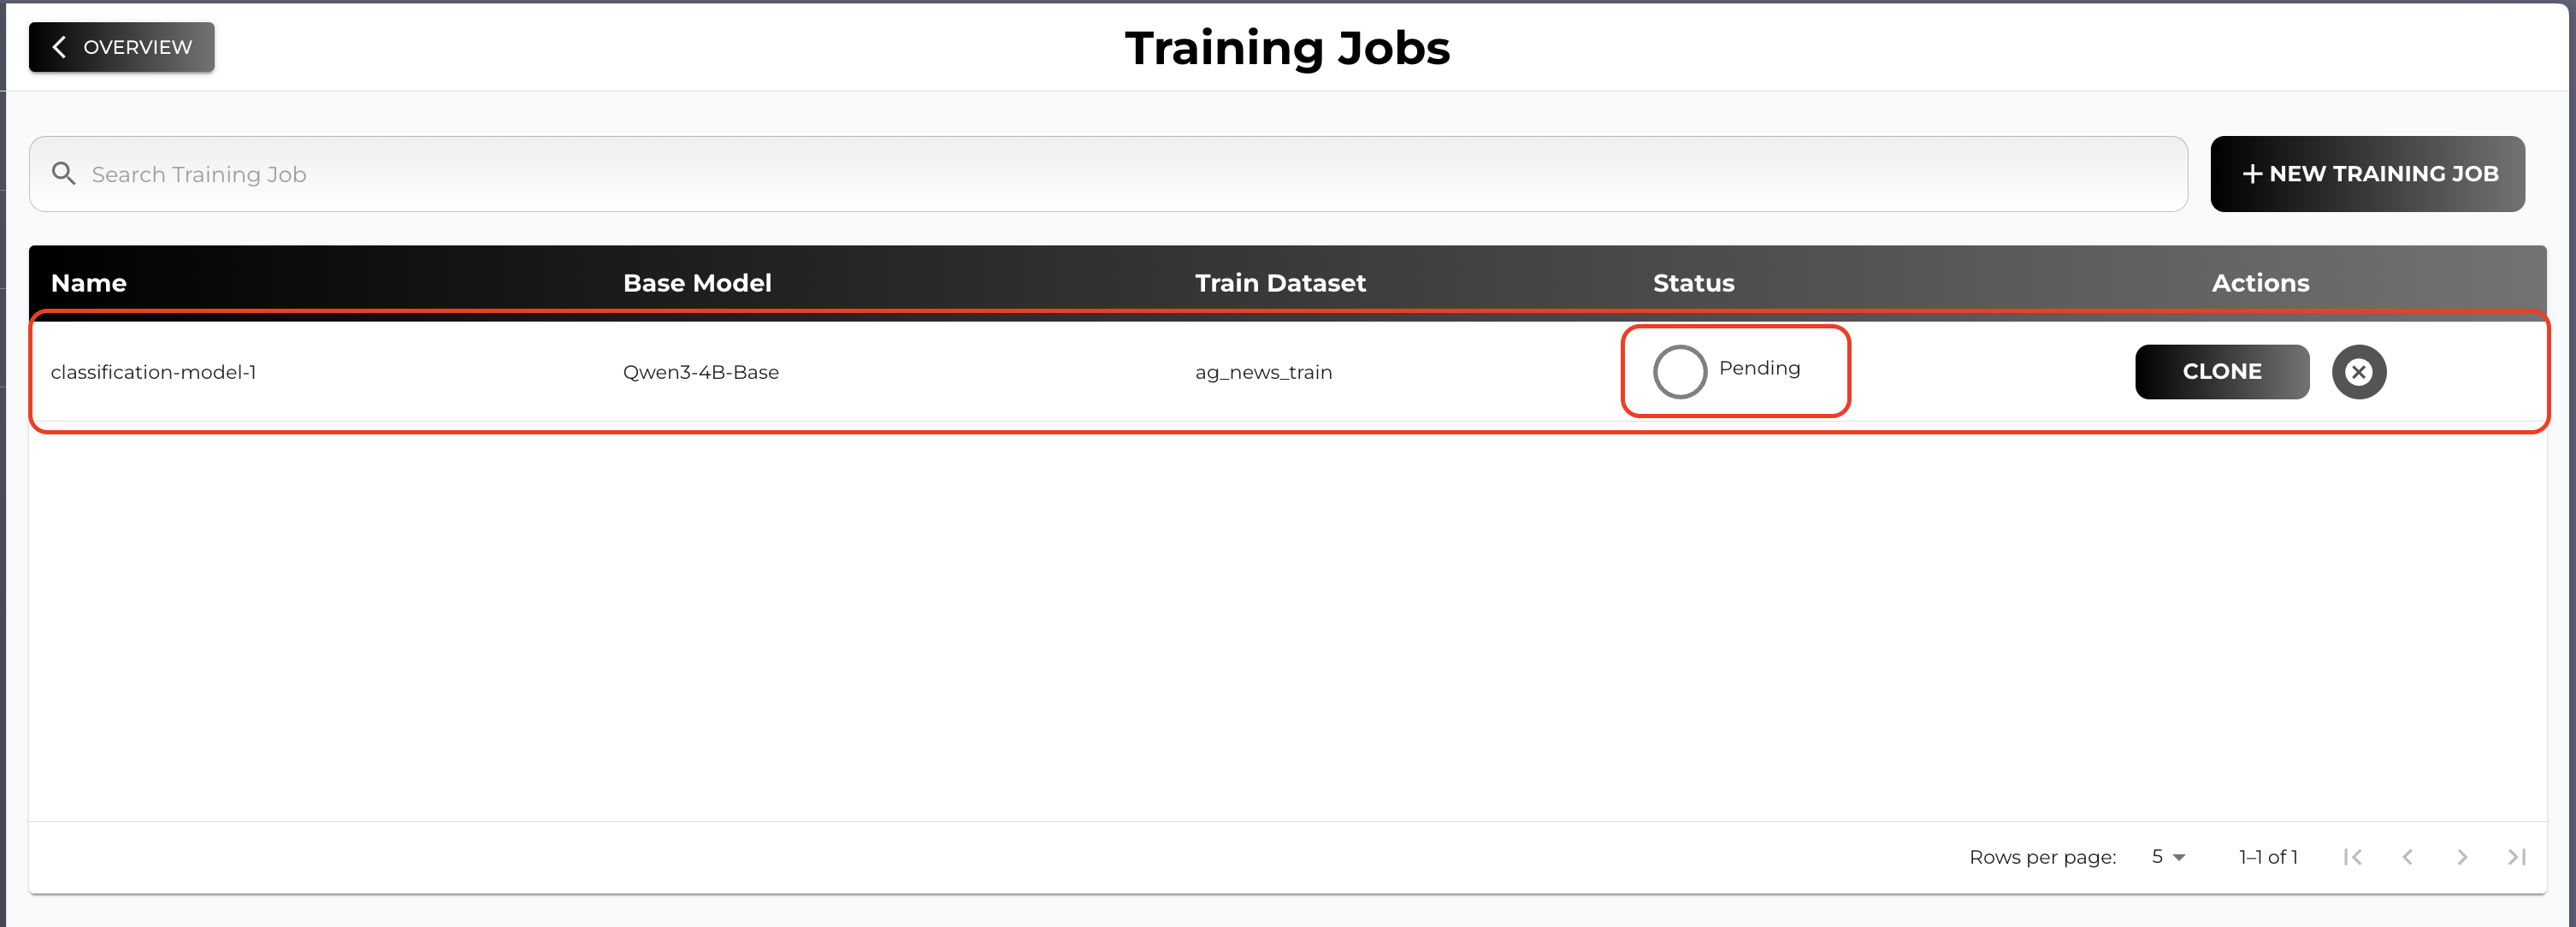
If you click the row you will be navigated to the training job detail page
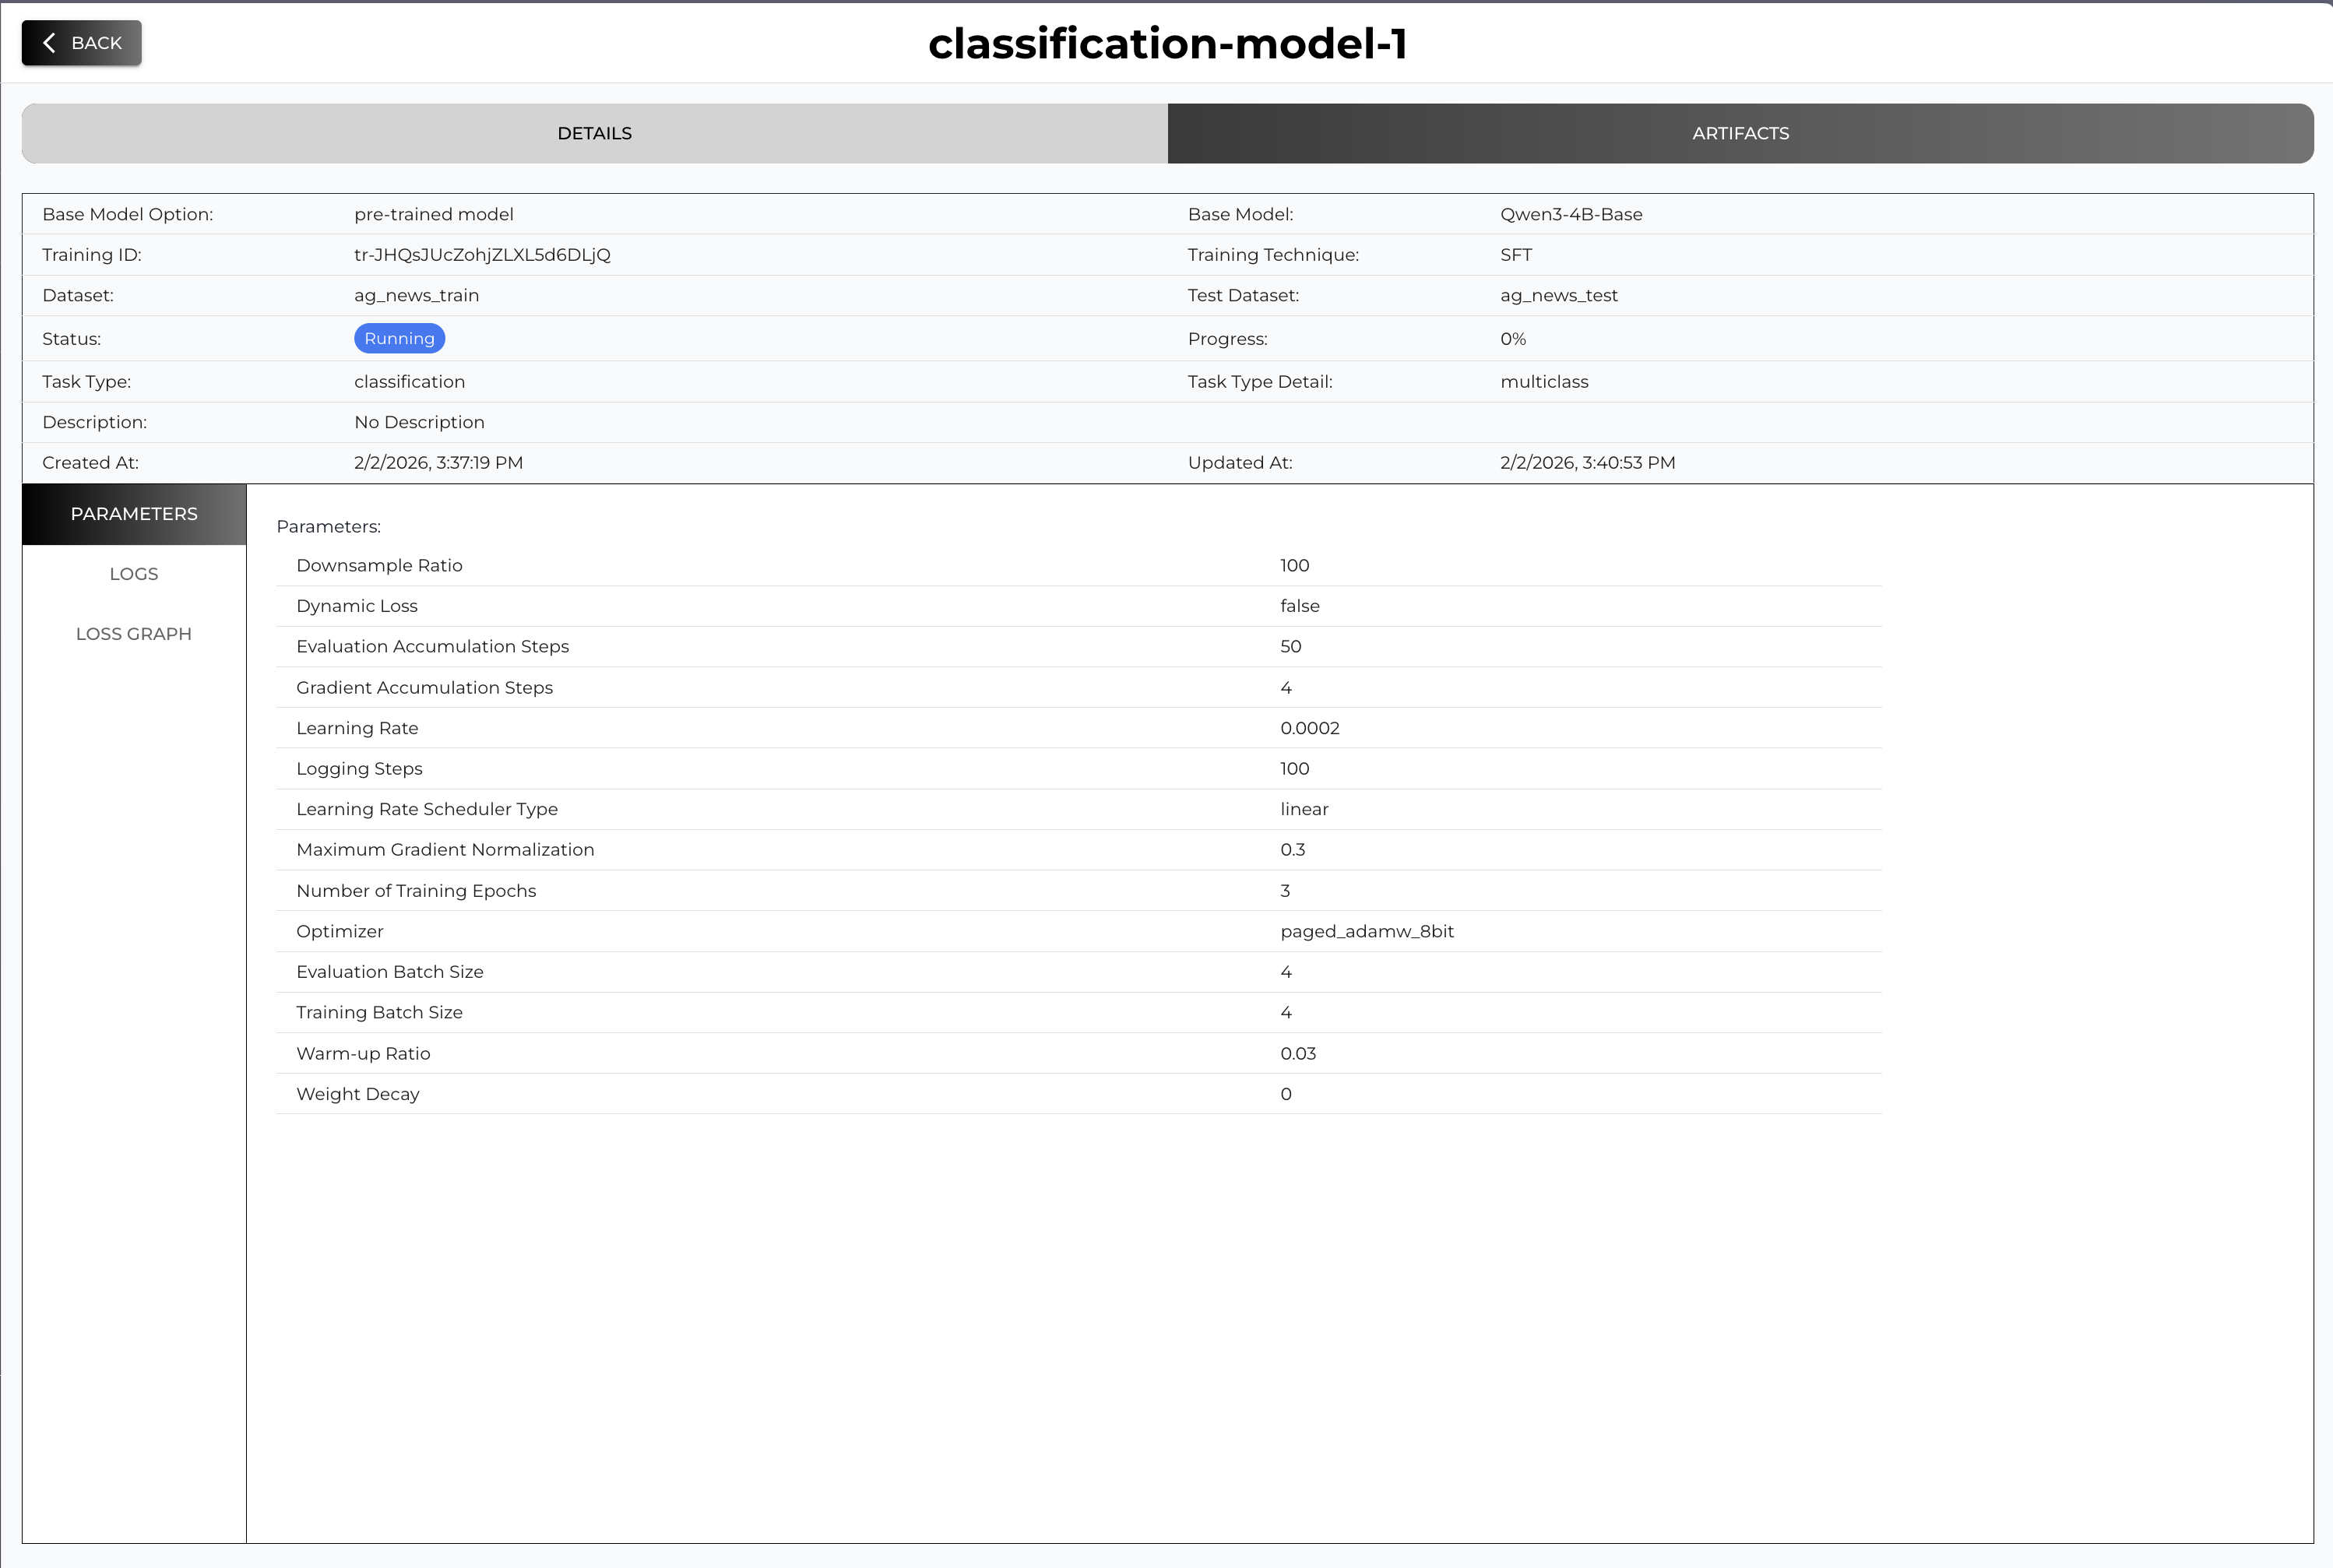
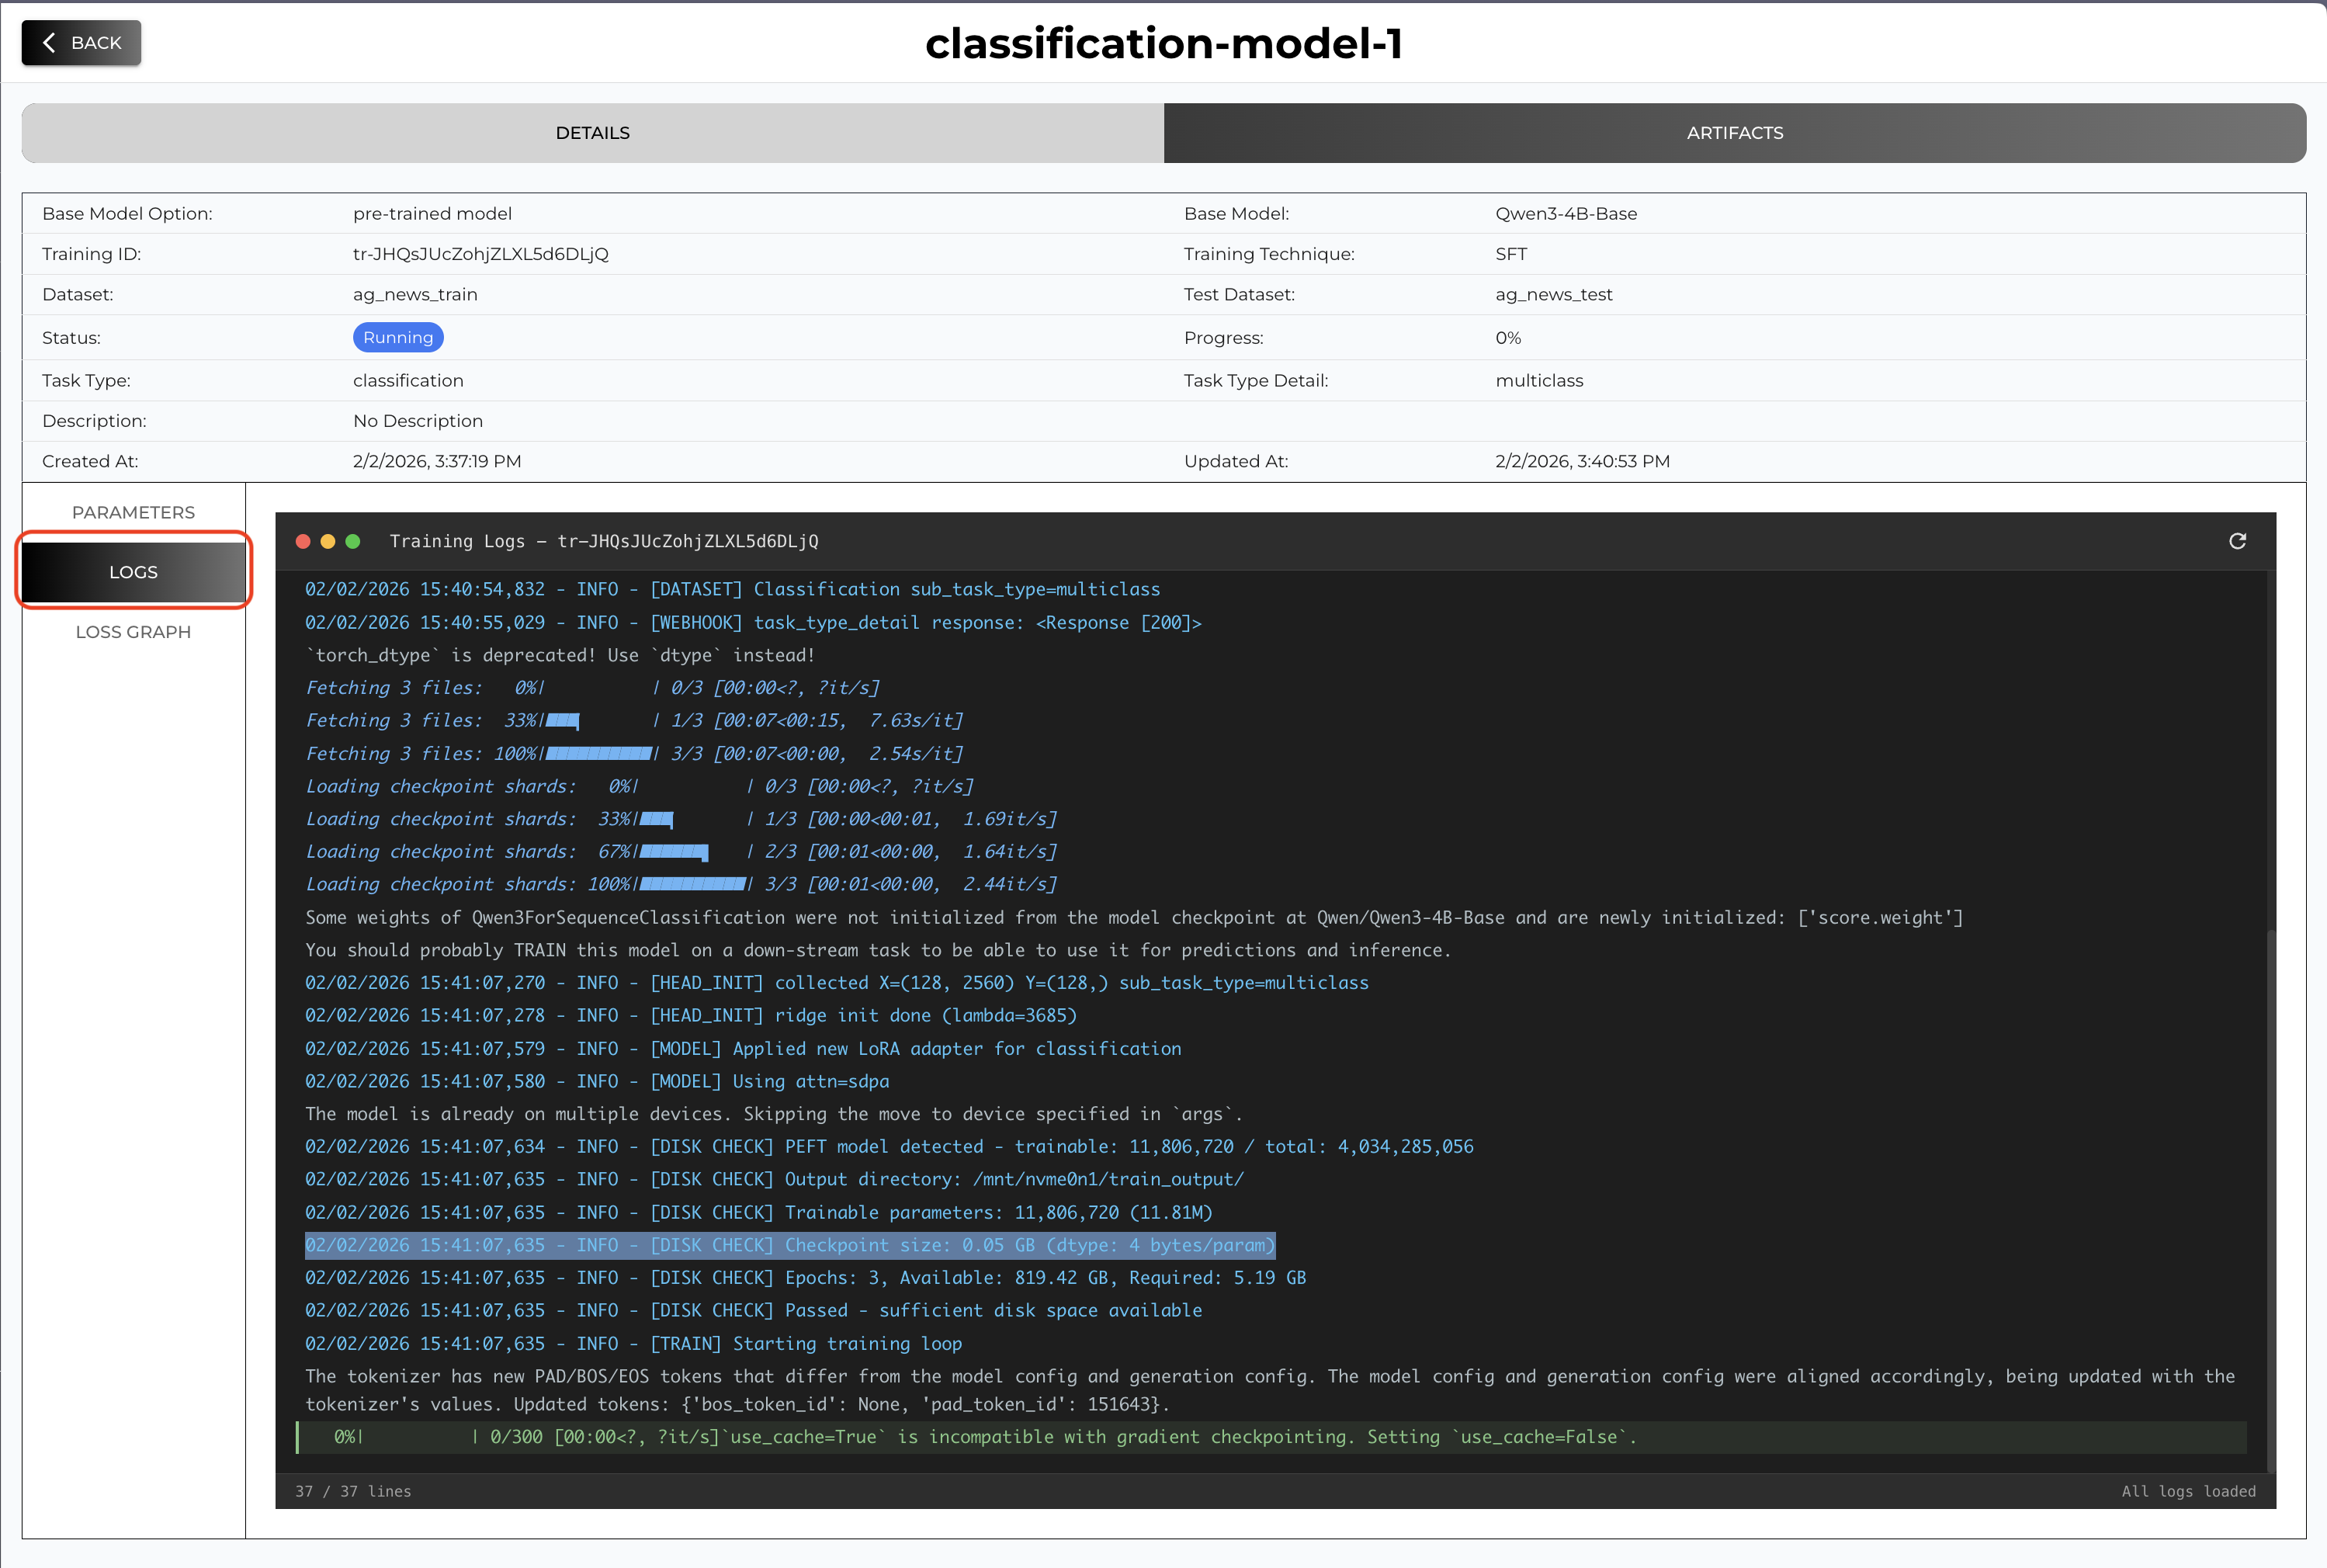
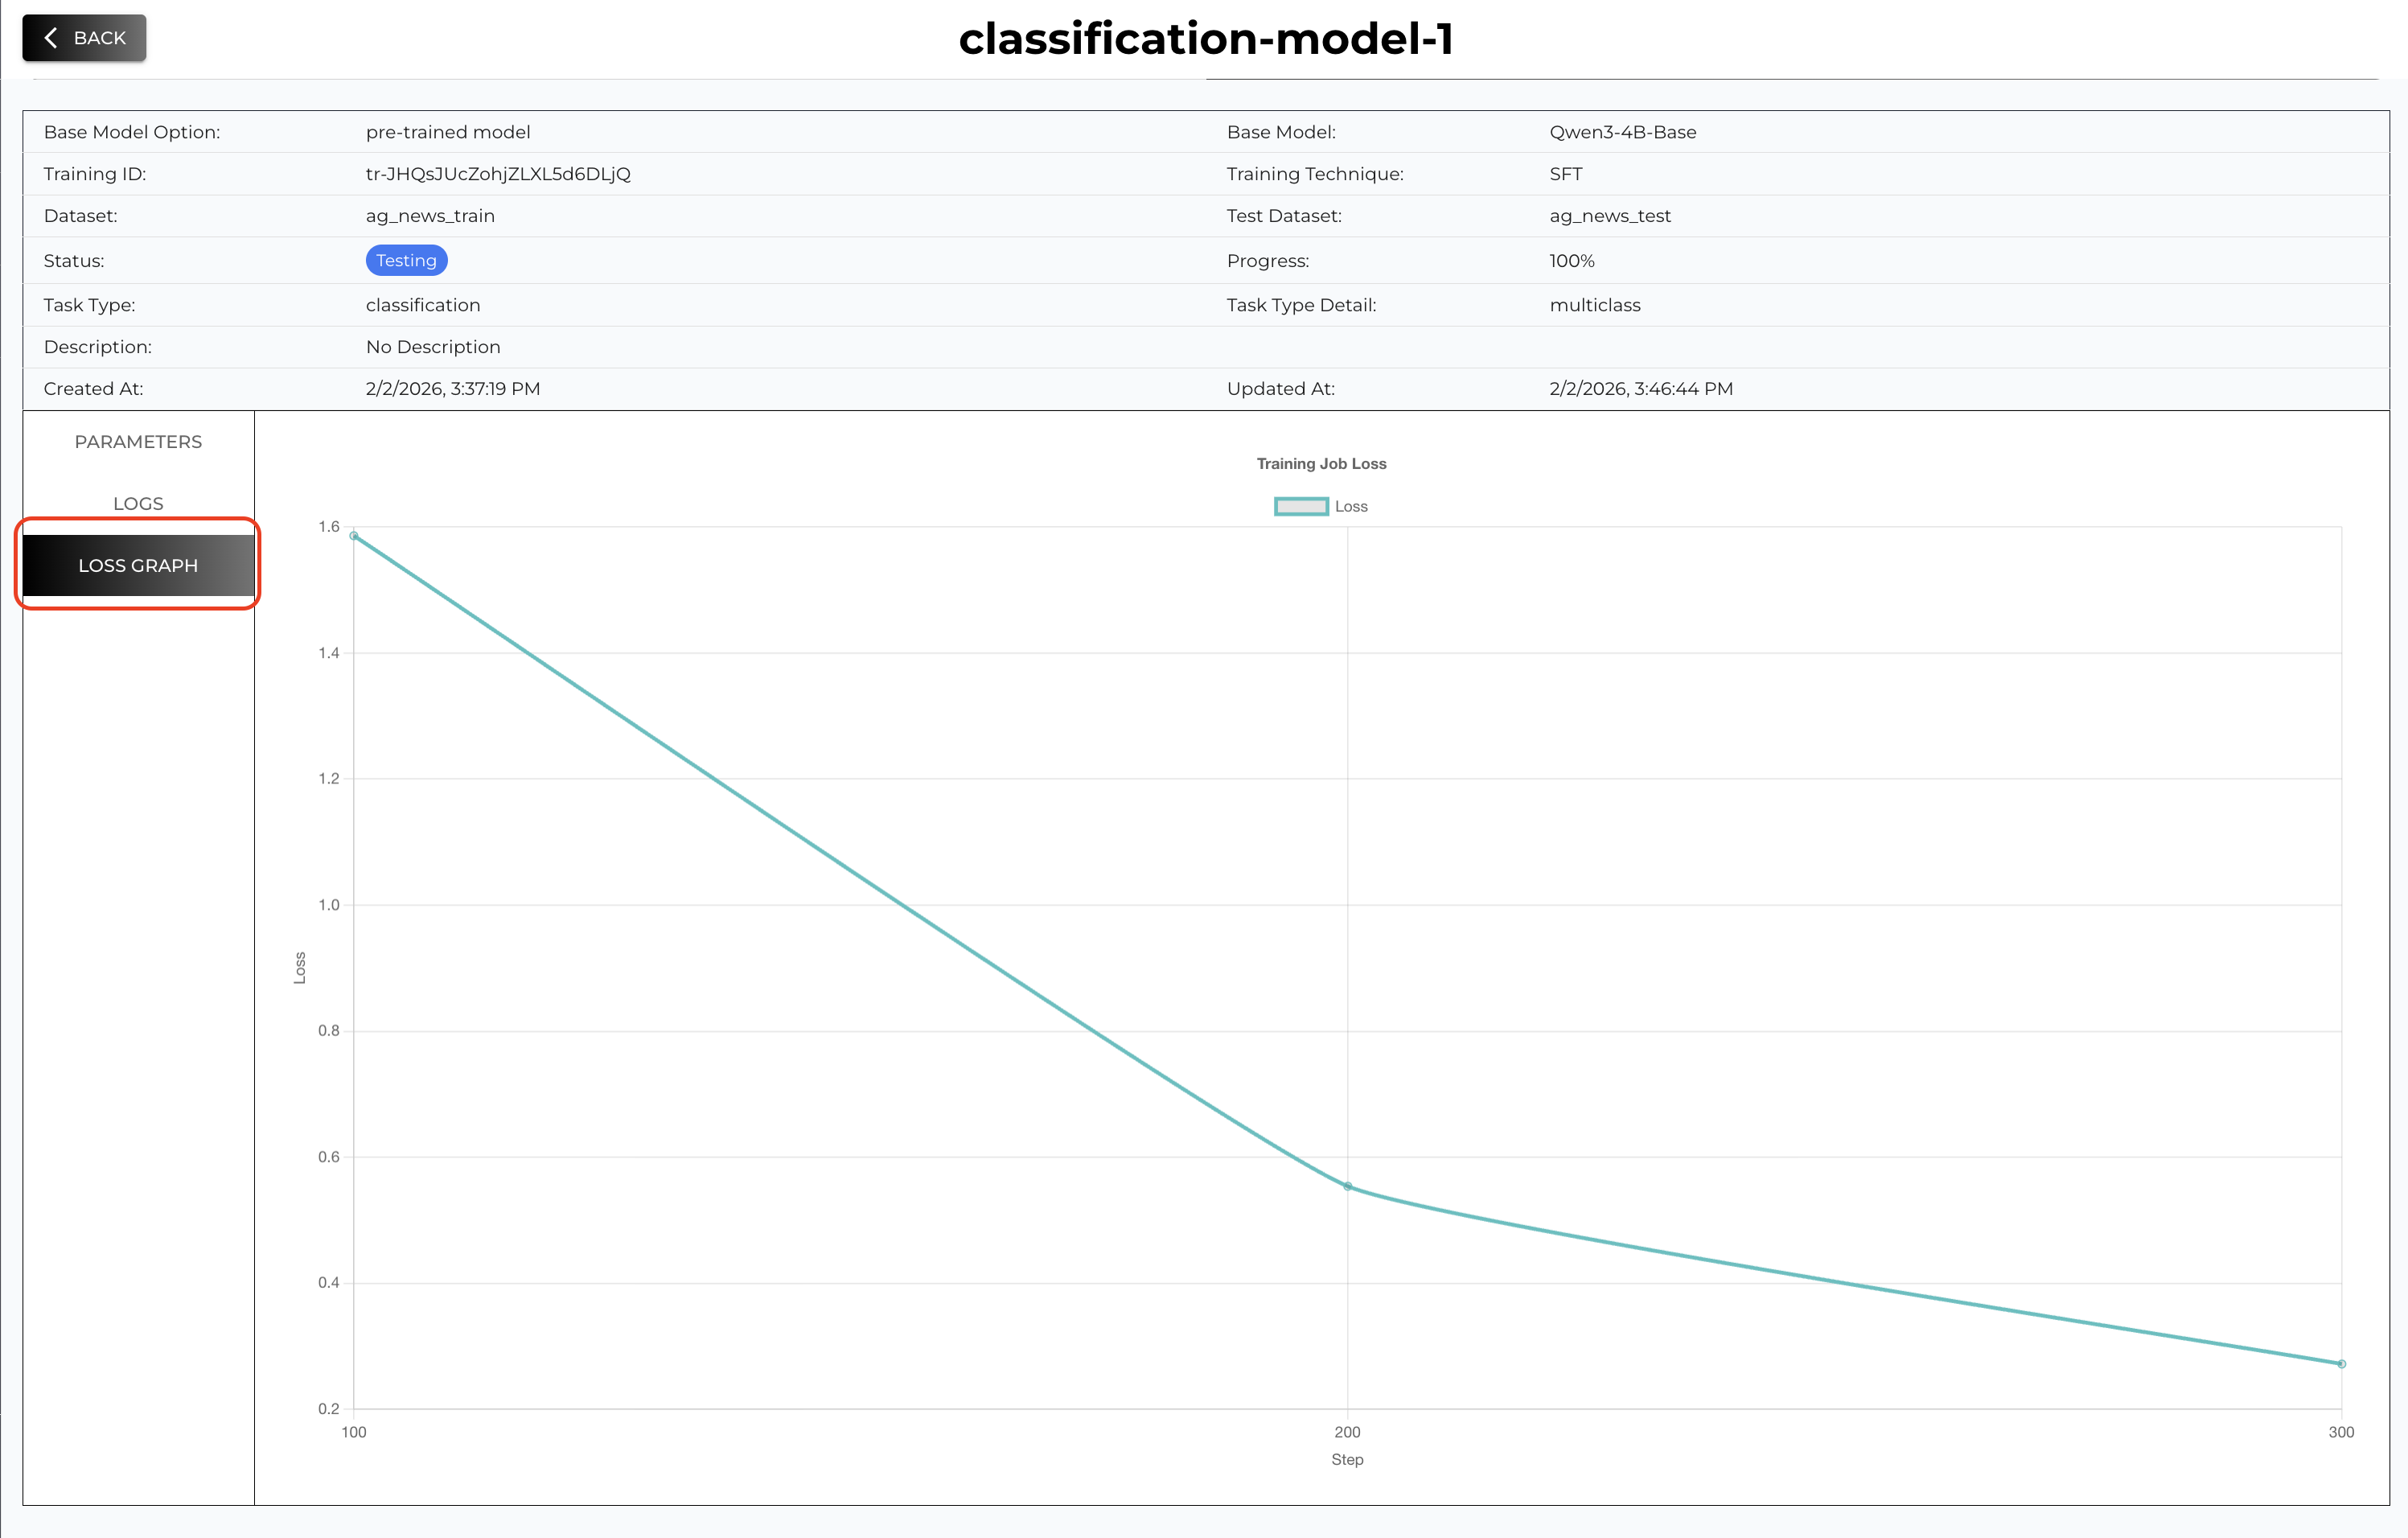
You can check the Status and Progress from the summary and you can also check the live logs and loss graph when you click the tab on the side
Go to Artifacts tab to check checkpoints and test results (if test dataset and functions provided).
6. Deployment
From the Artifacts tab you can deploy any checkpoint from the training job by hitting DEPLOY button.
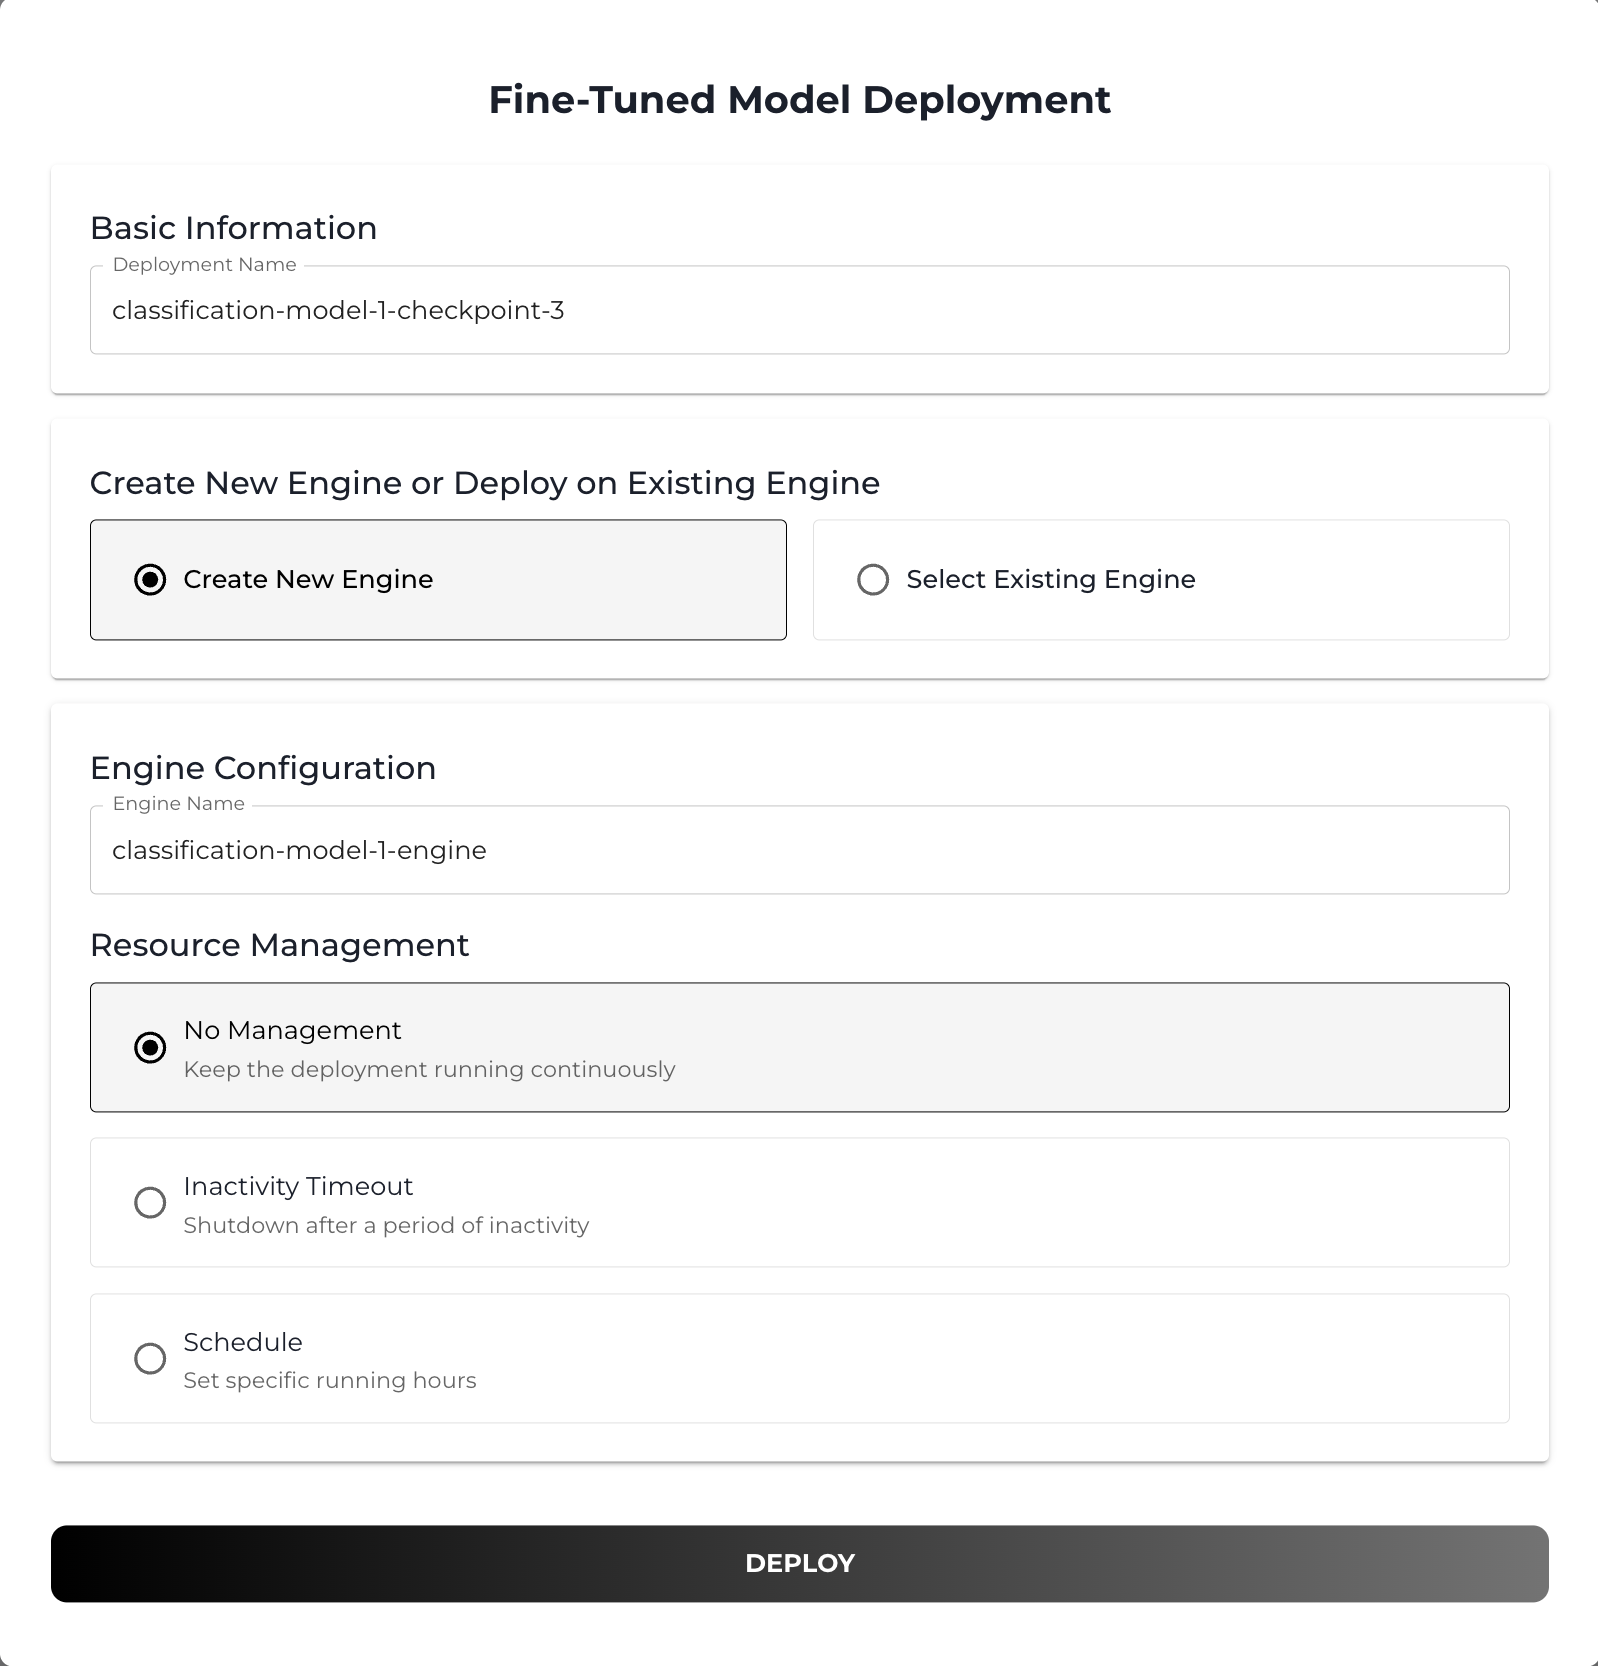
(Optional) You can also set resource management when creating a deployment. Setting a inactivity timeout will shutdown your deployment (inference engine) after a period of inactivity. Also you can schedule your deployment to be run in specific date and time.
Once you initiate your deployment you go to Inference dashboard and you will see your recent / previous deployments.
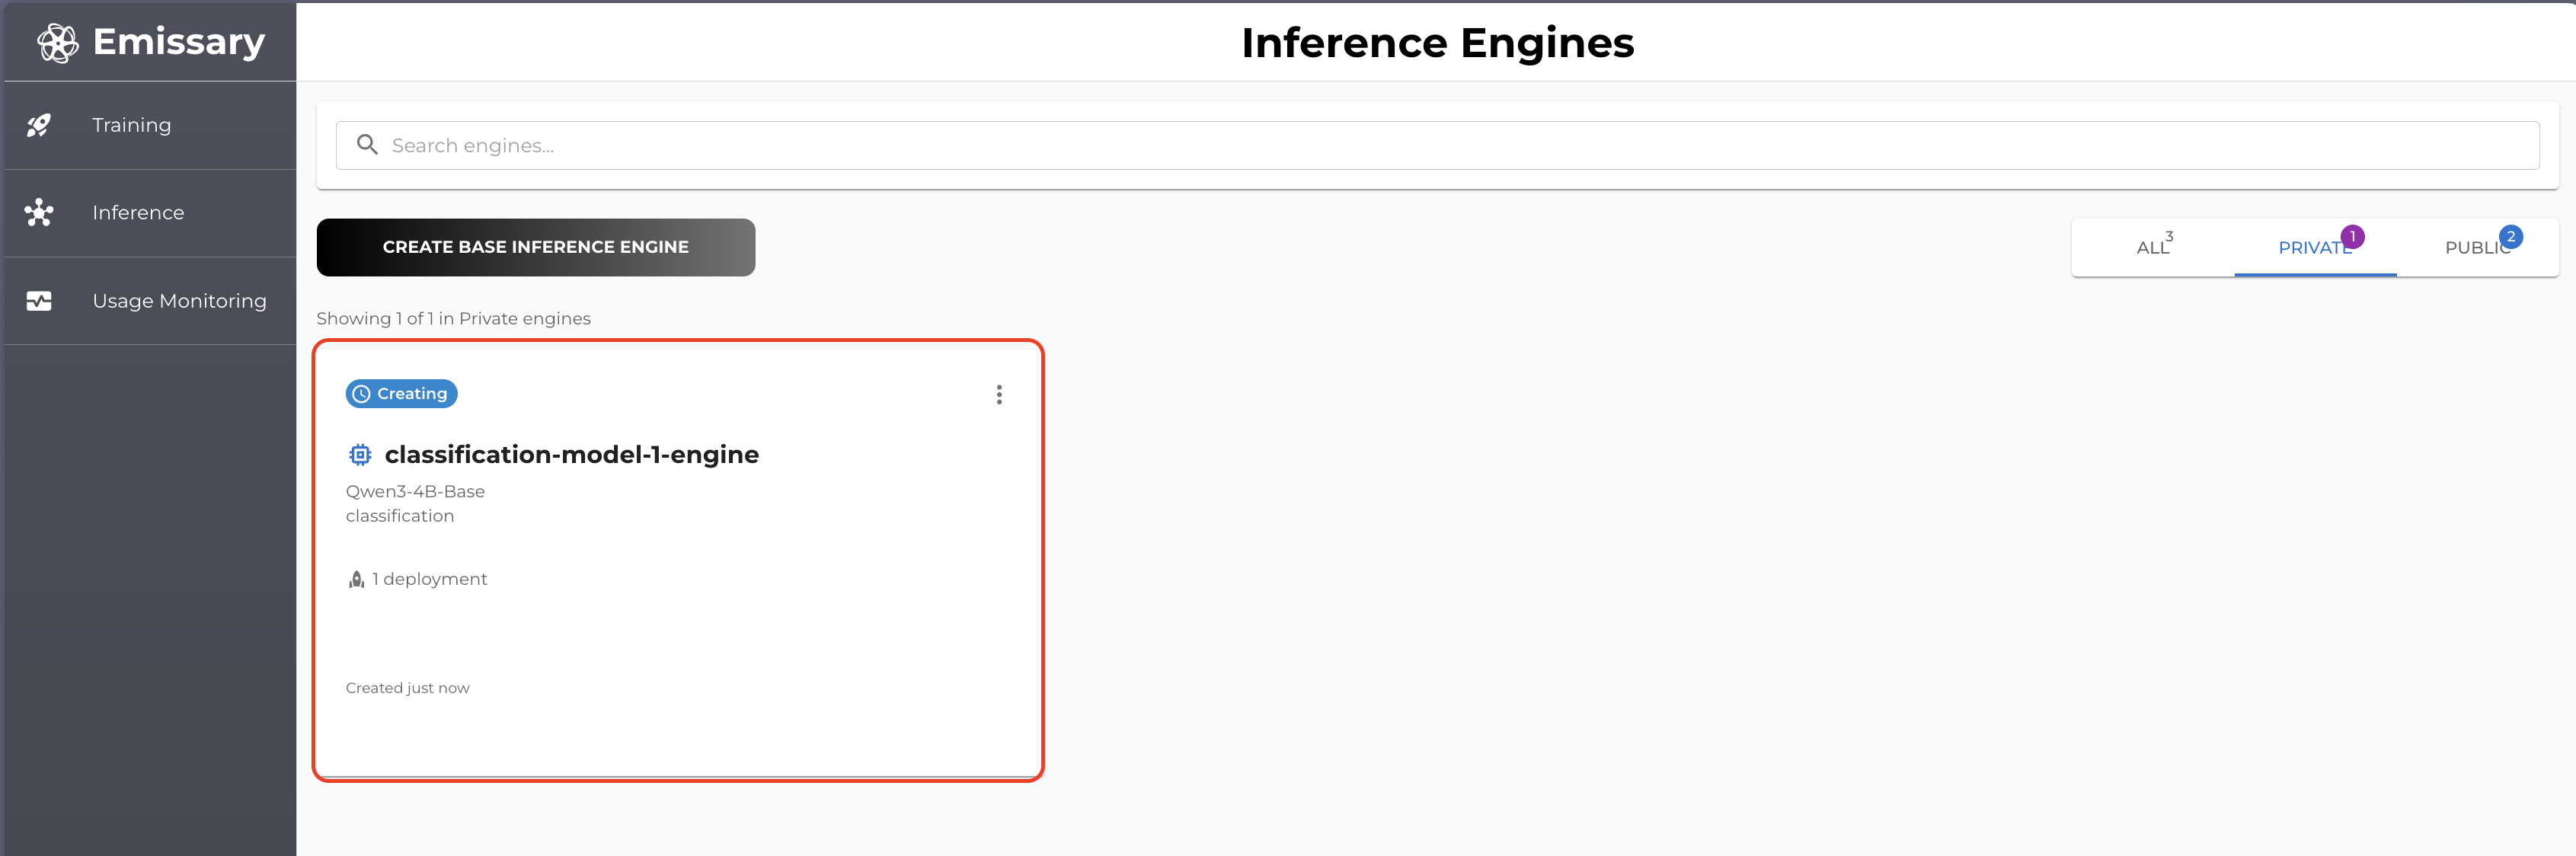
By clicking the card you can see the details of your deployment (inference engine).
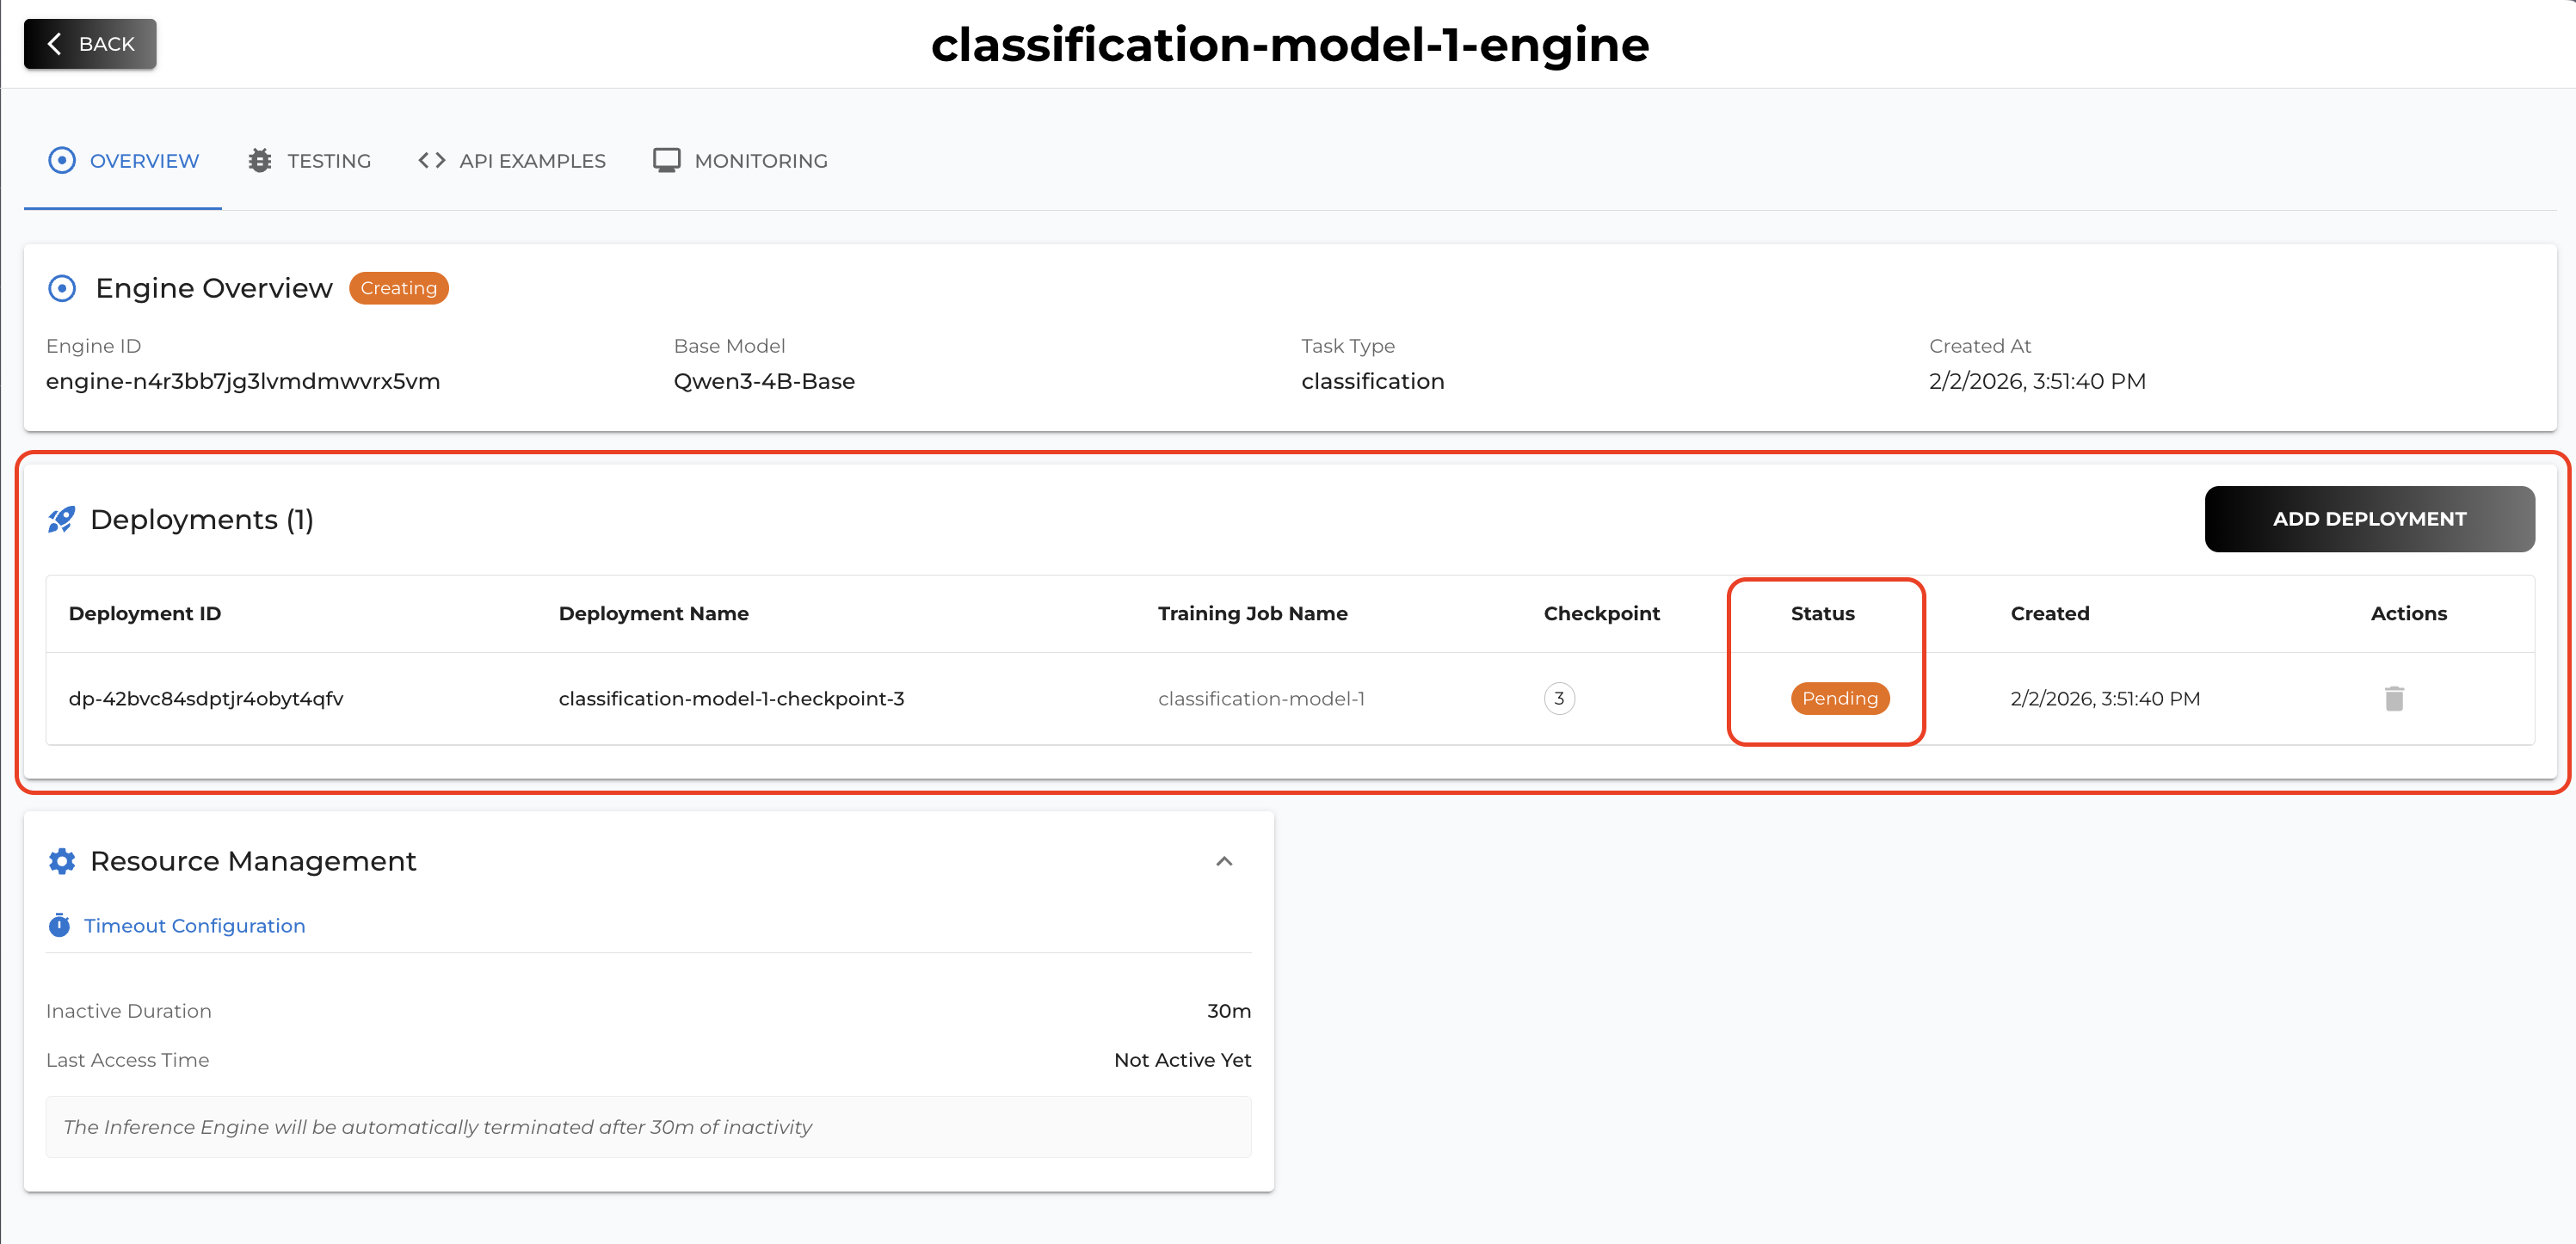
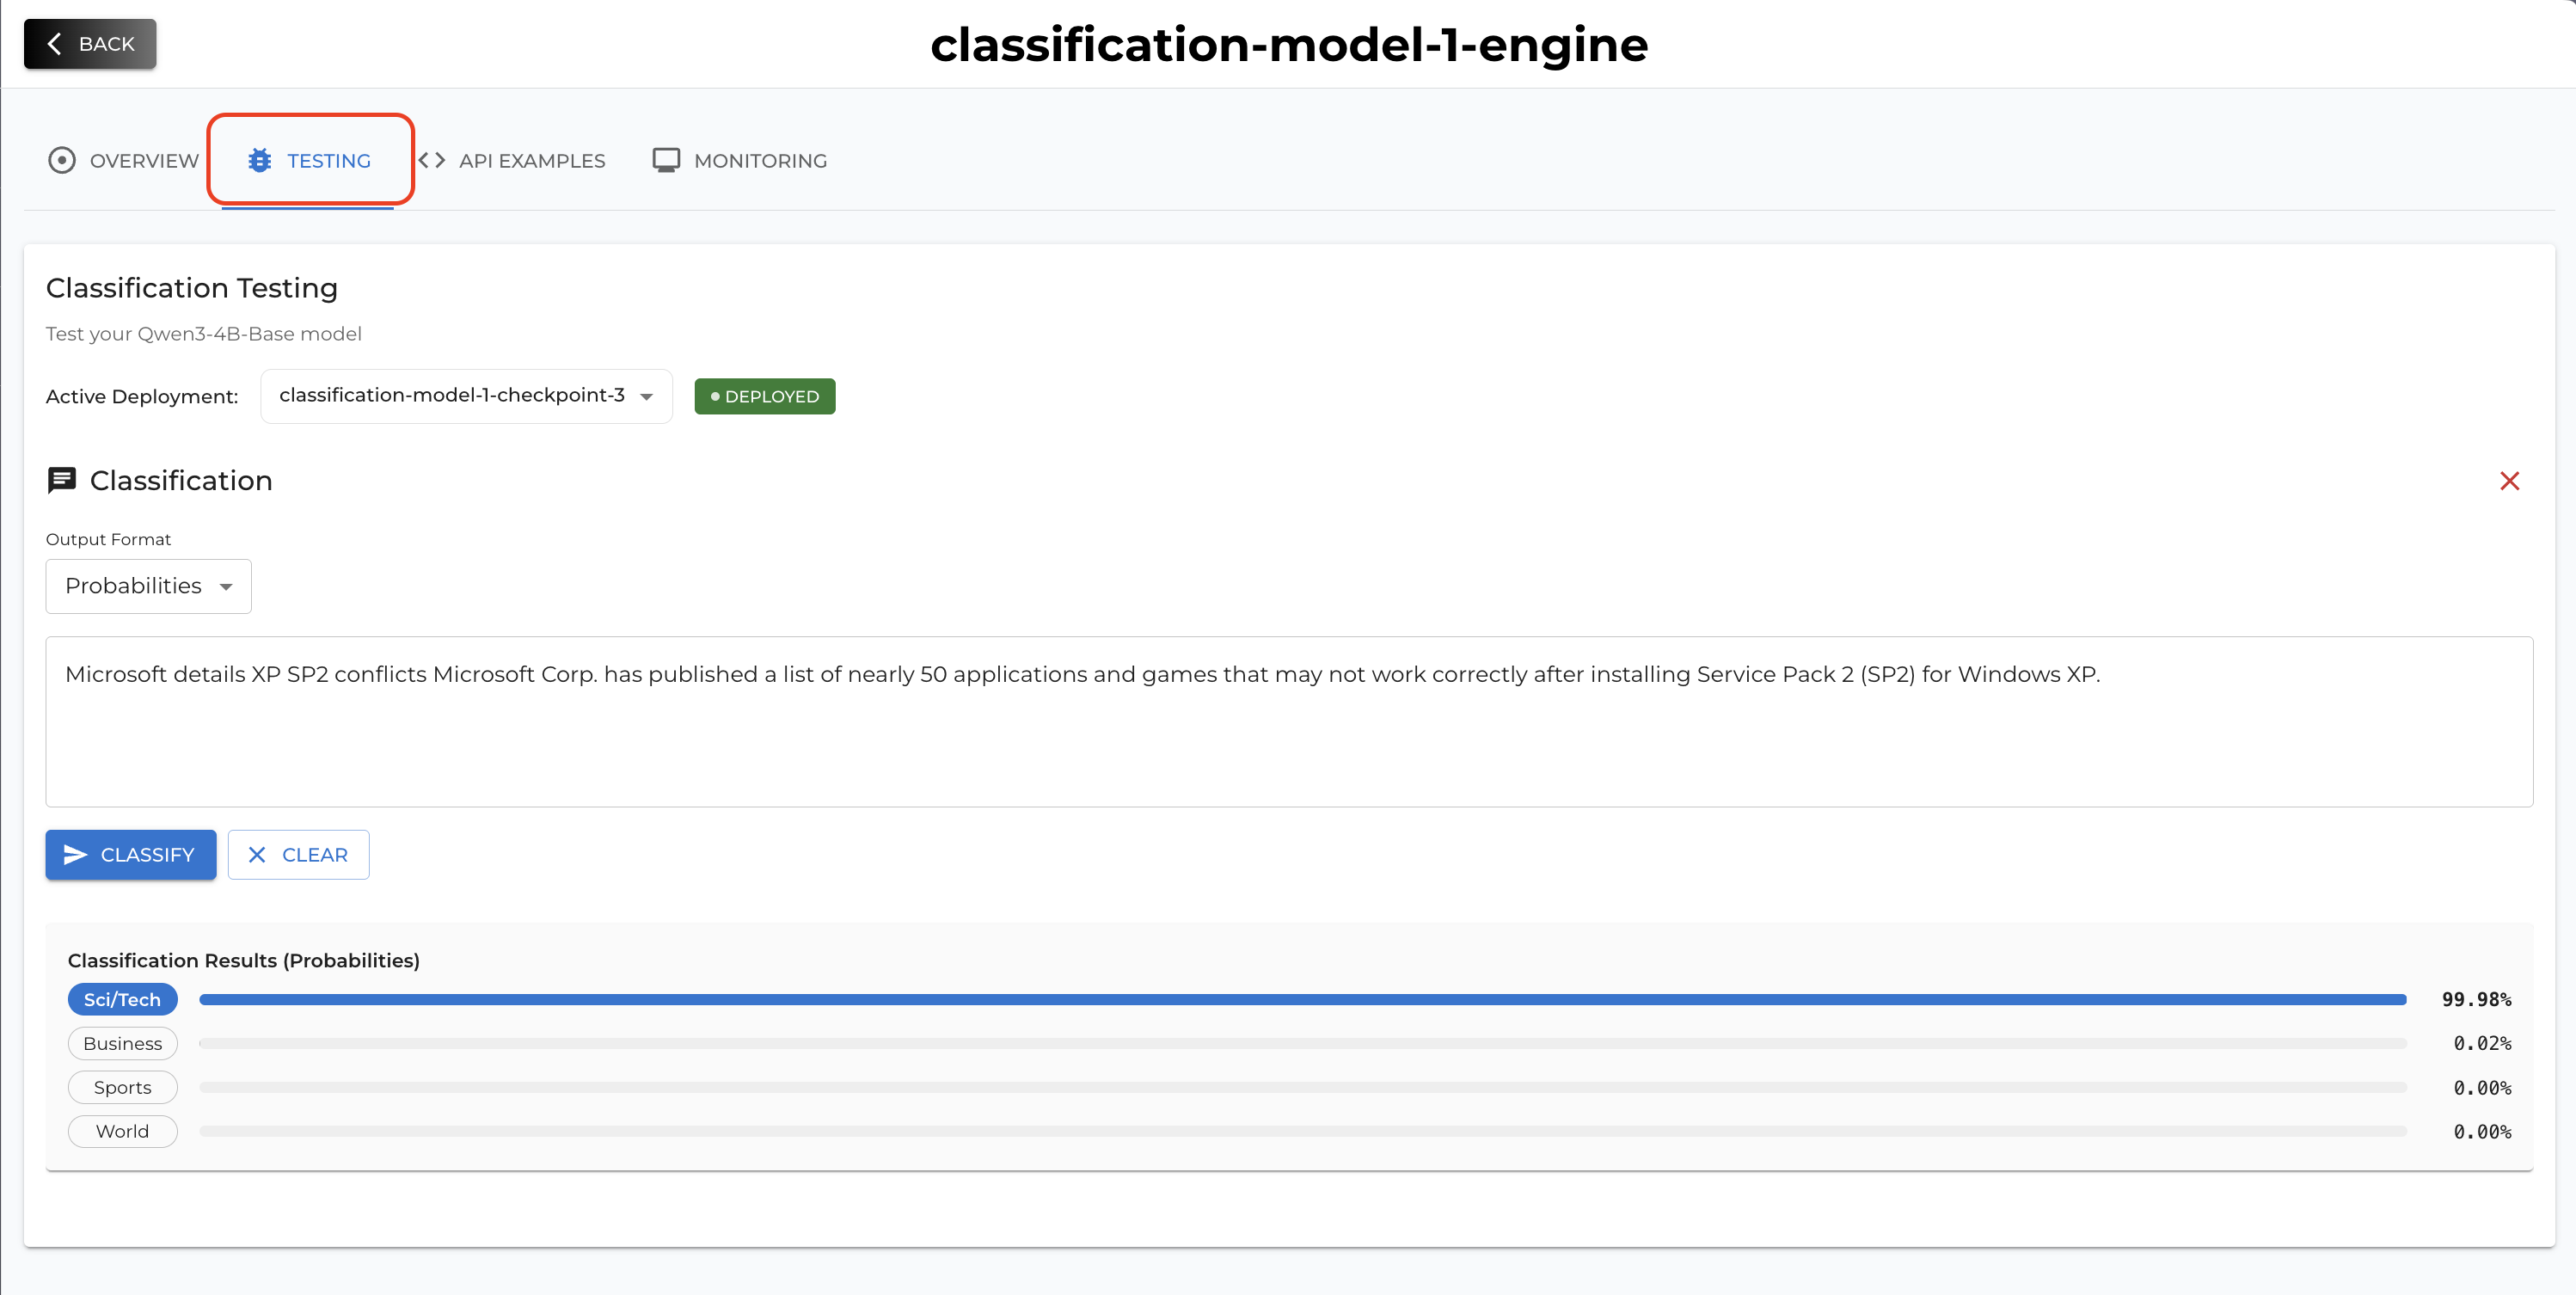
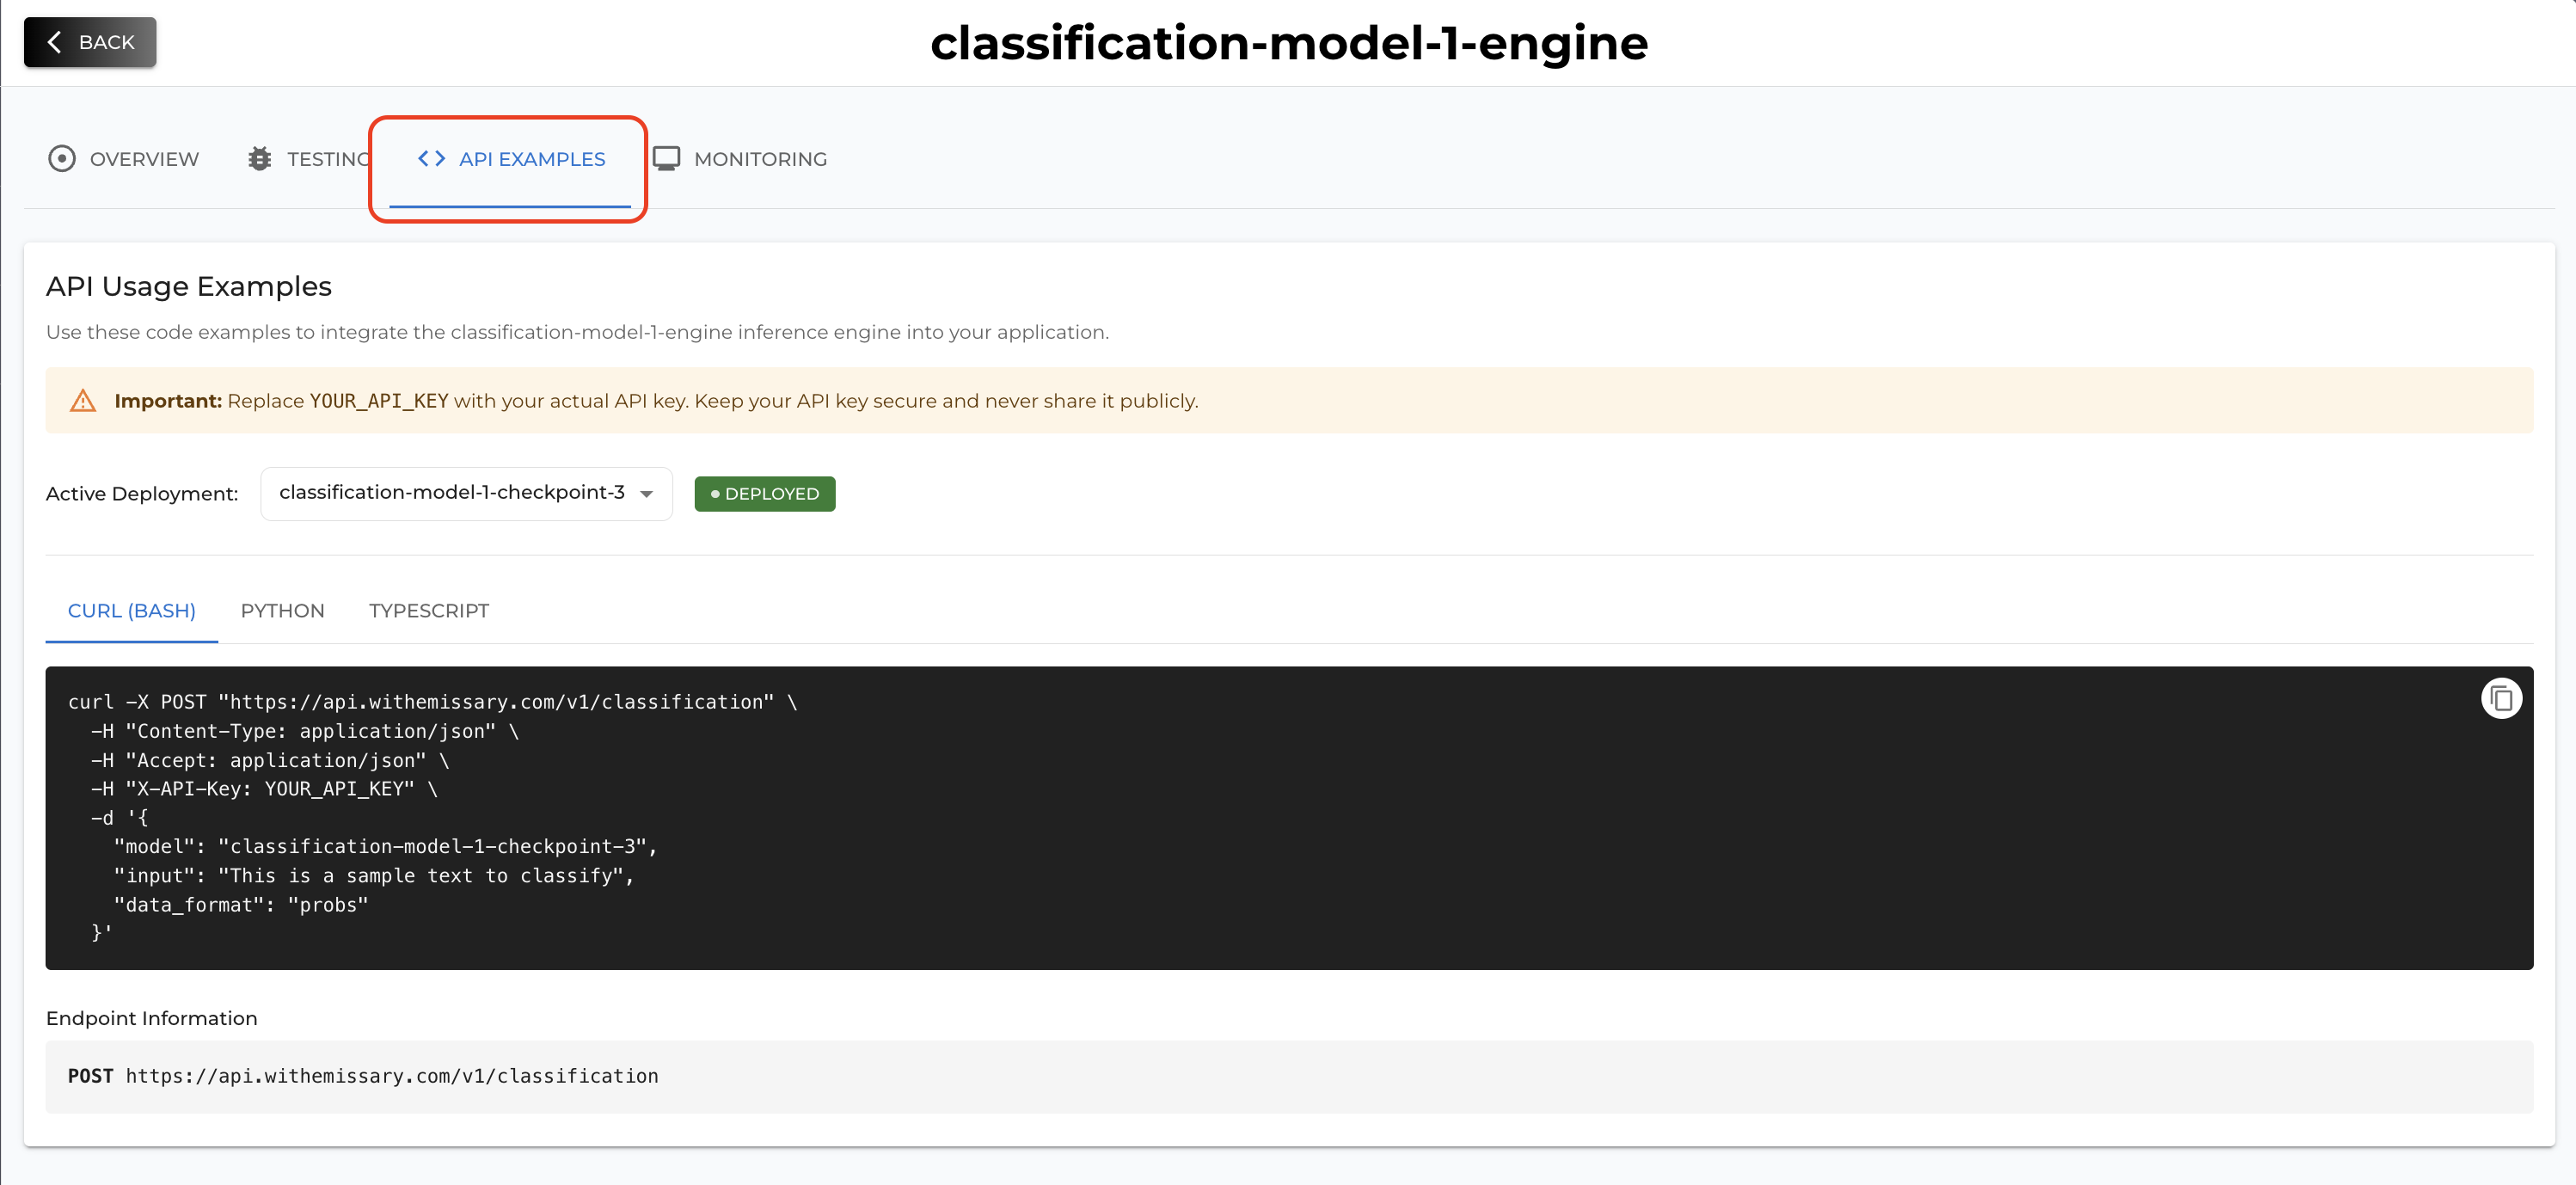
Once your deployment status becomes Deployed then it means your inference server is ready to be used. You can test your deployment on Testing tab (UI) or you can also call by API referring the API examples tab.
7. Best Practices
- Start Small: Begin with a smaller dataset to validate your setup.
- Monitor Training: Keep an eye on training logs and metrics.
- Iterative Testing: Use the test dataset to iteratively improve your model.
- Data Format: Use the recommended data formats for your chosen model to ensure compatibility and optimal performance.